by Coffee Kevin | Jun 23, 2018 |

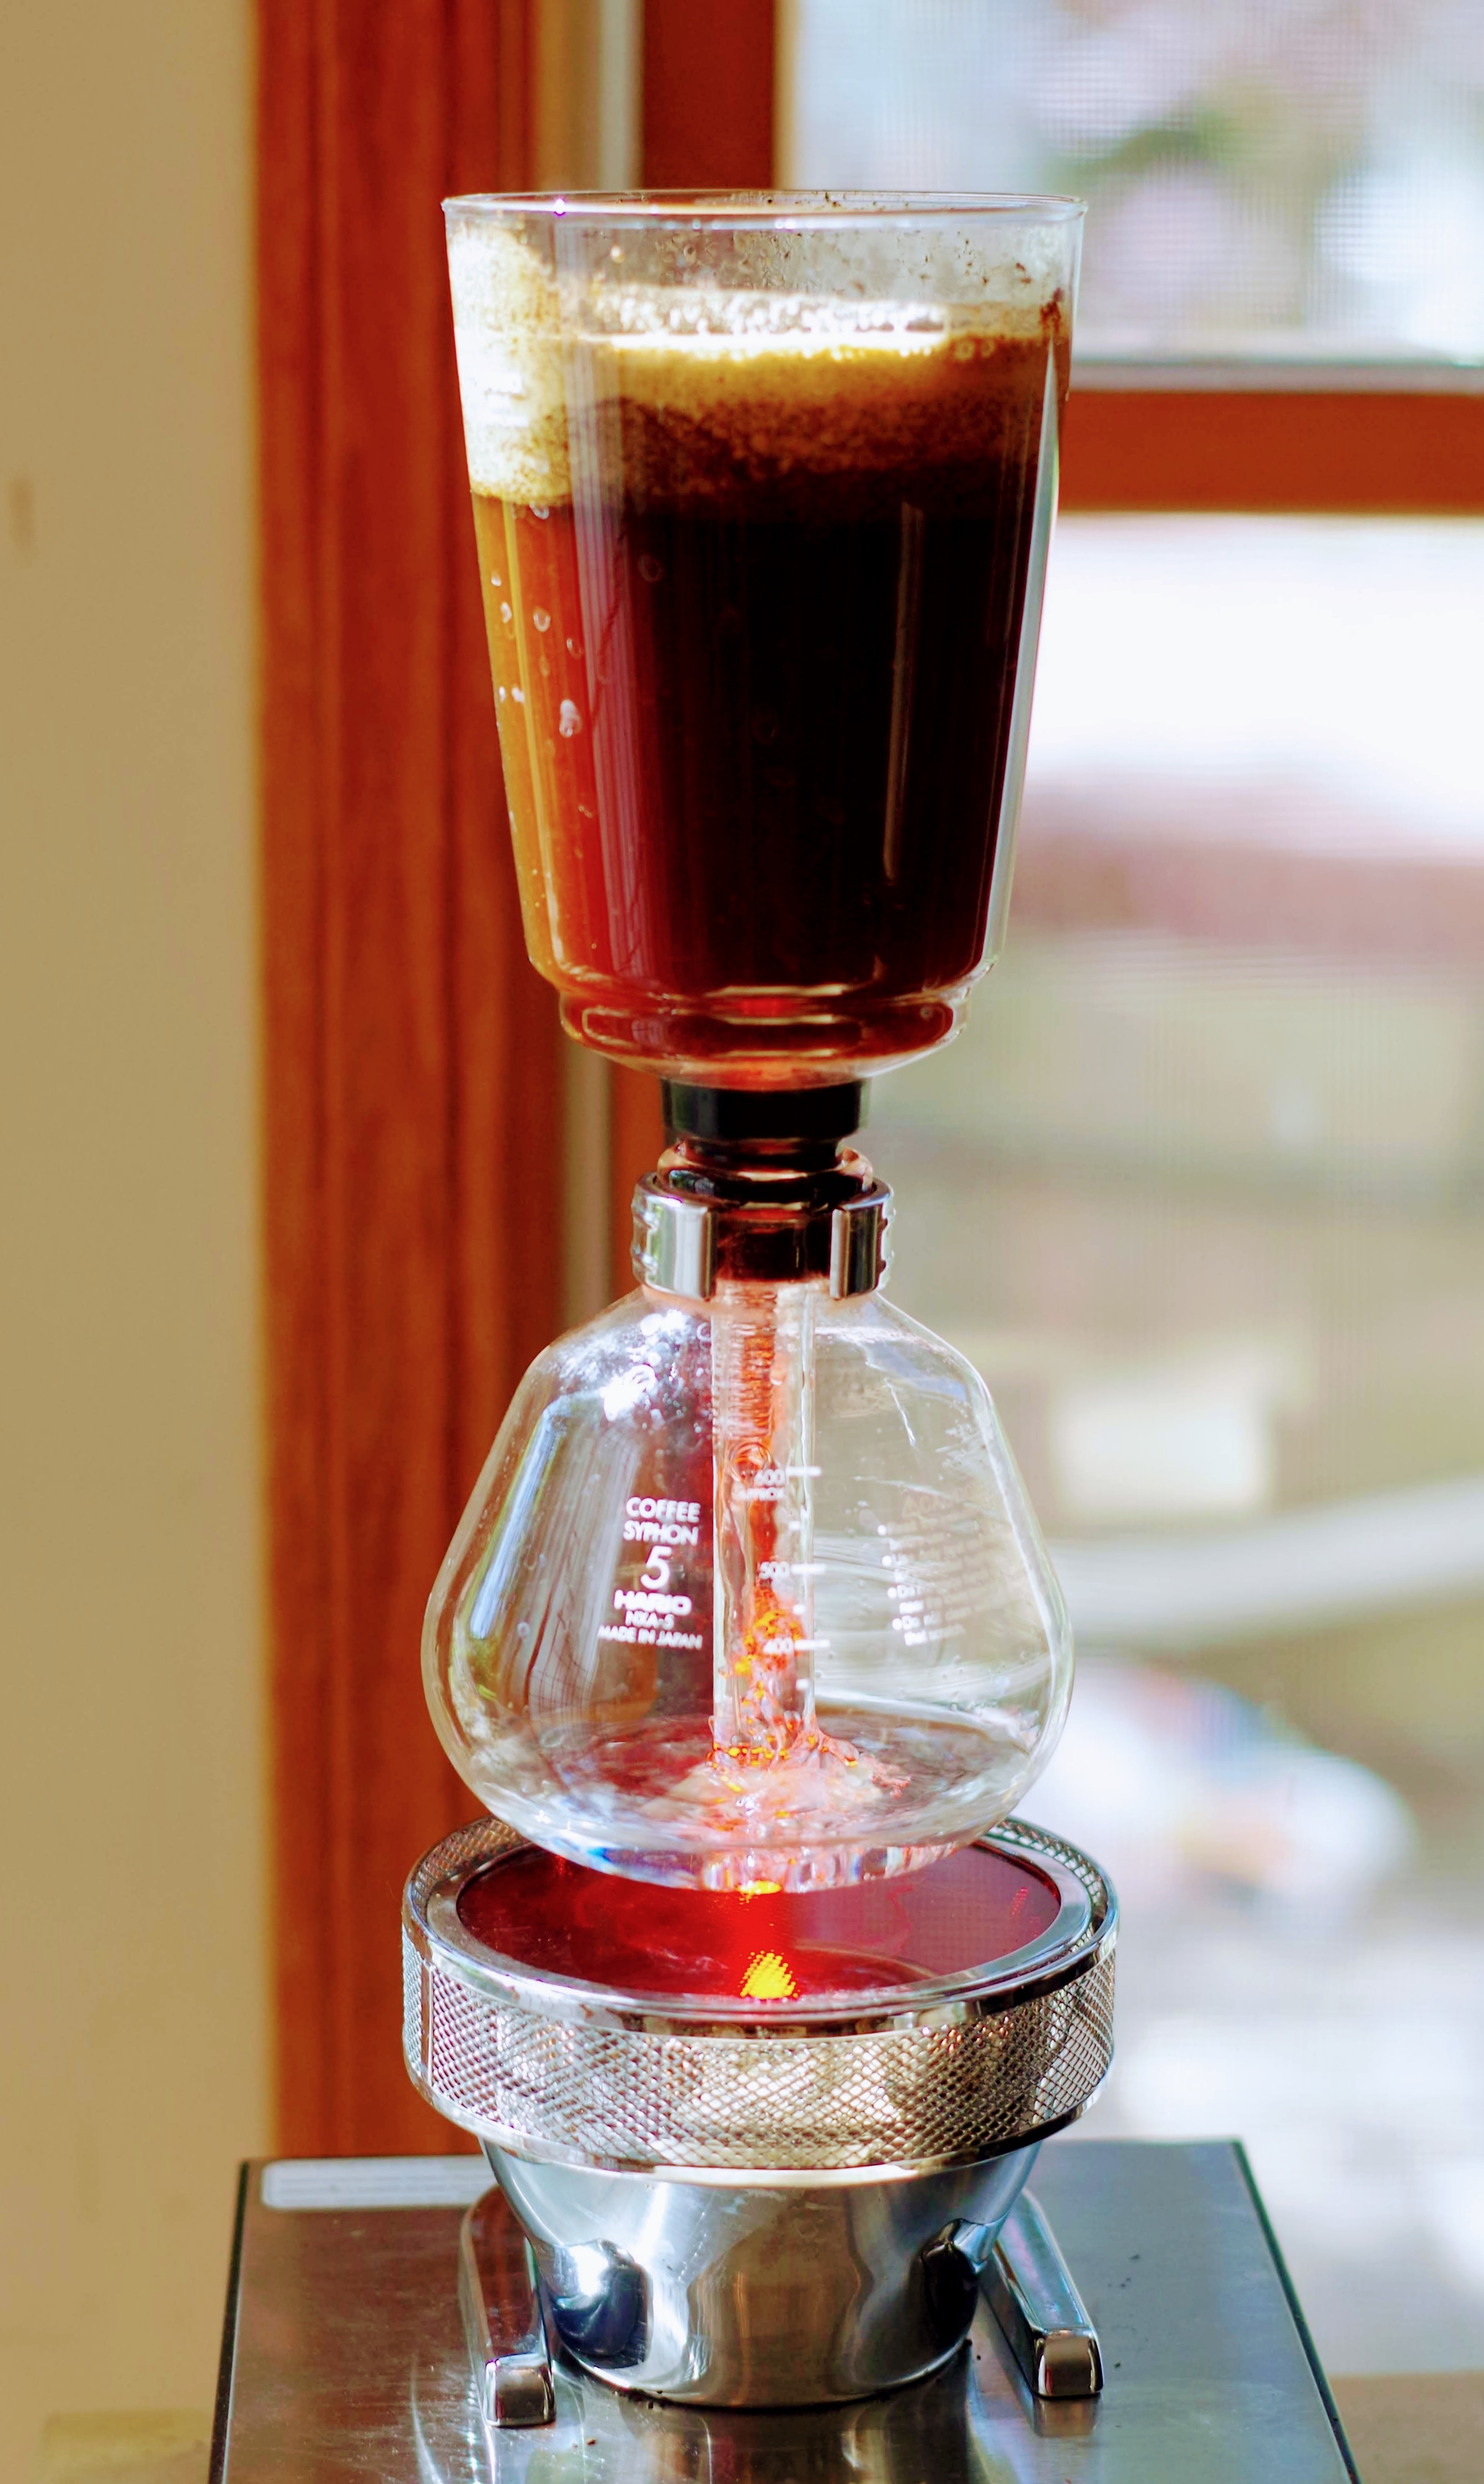
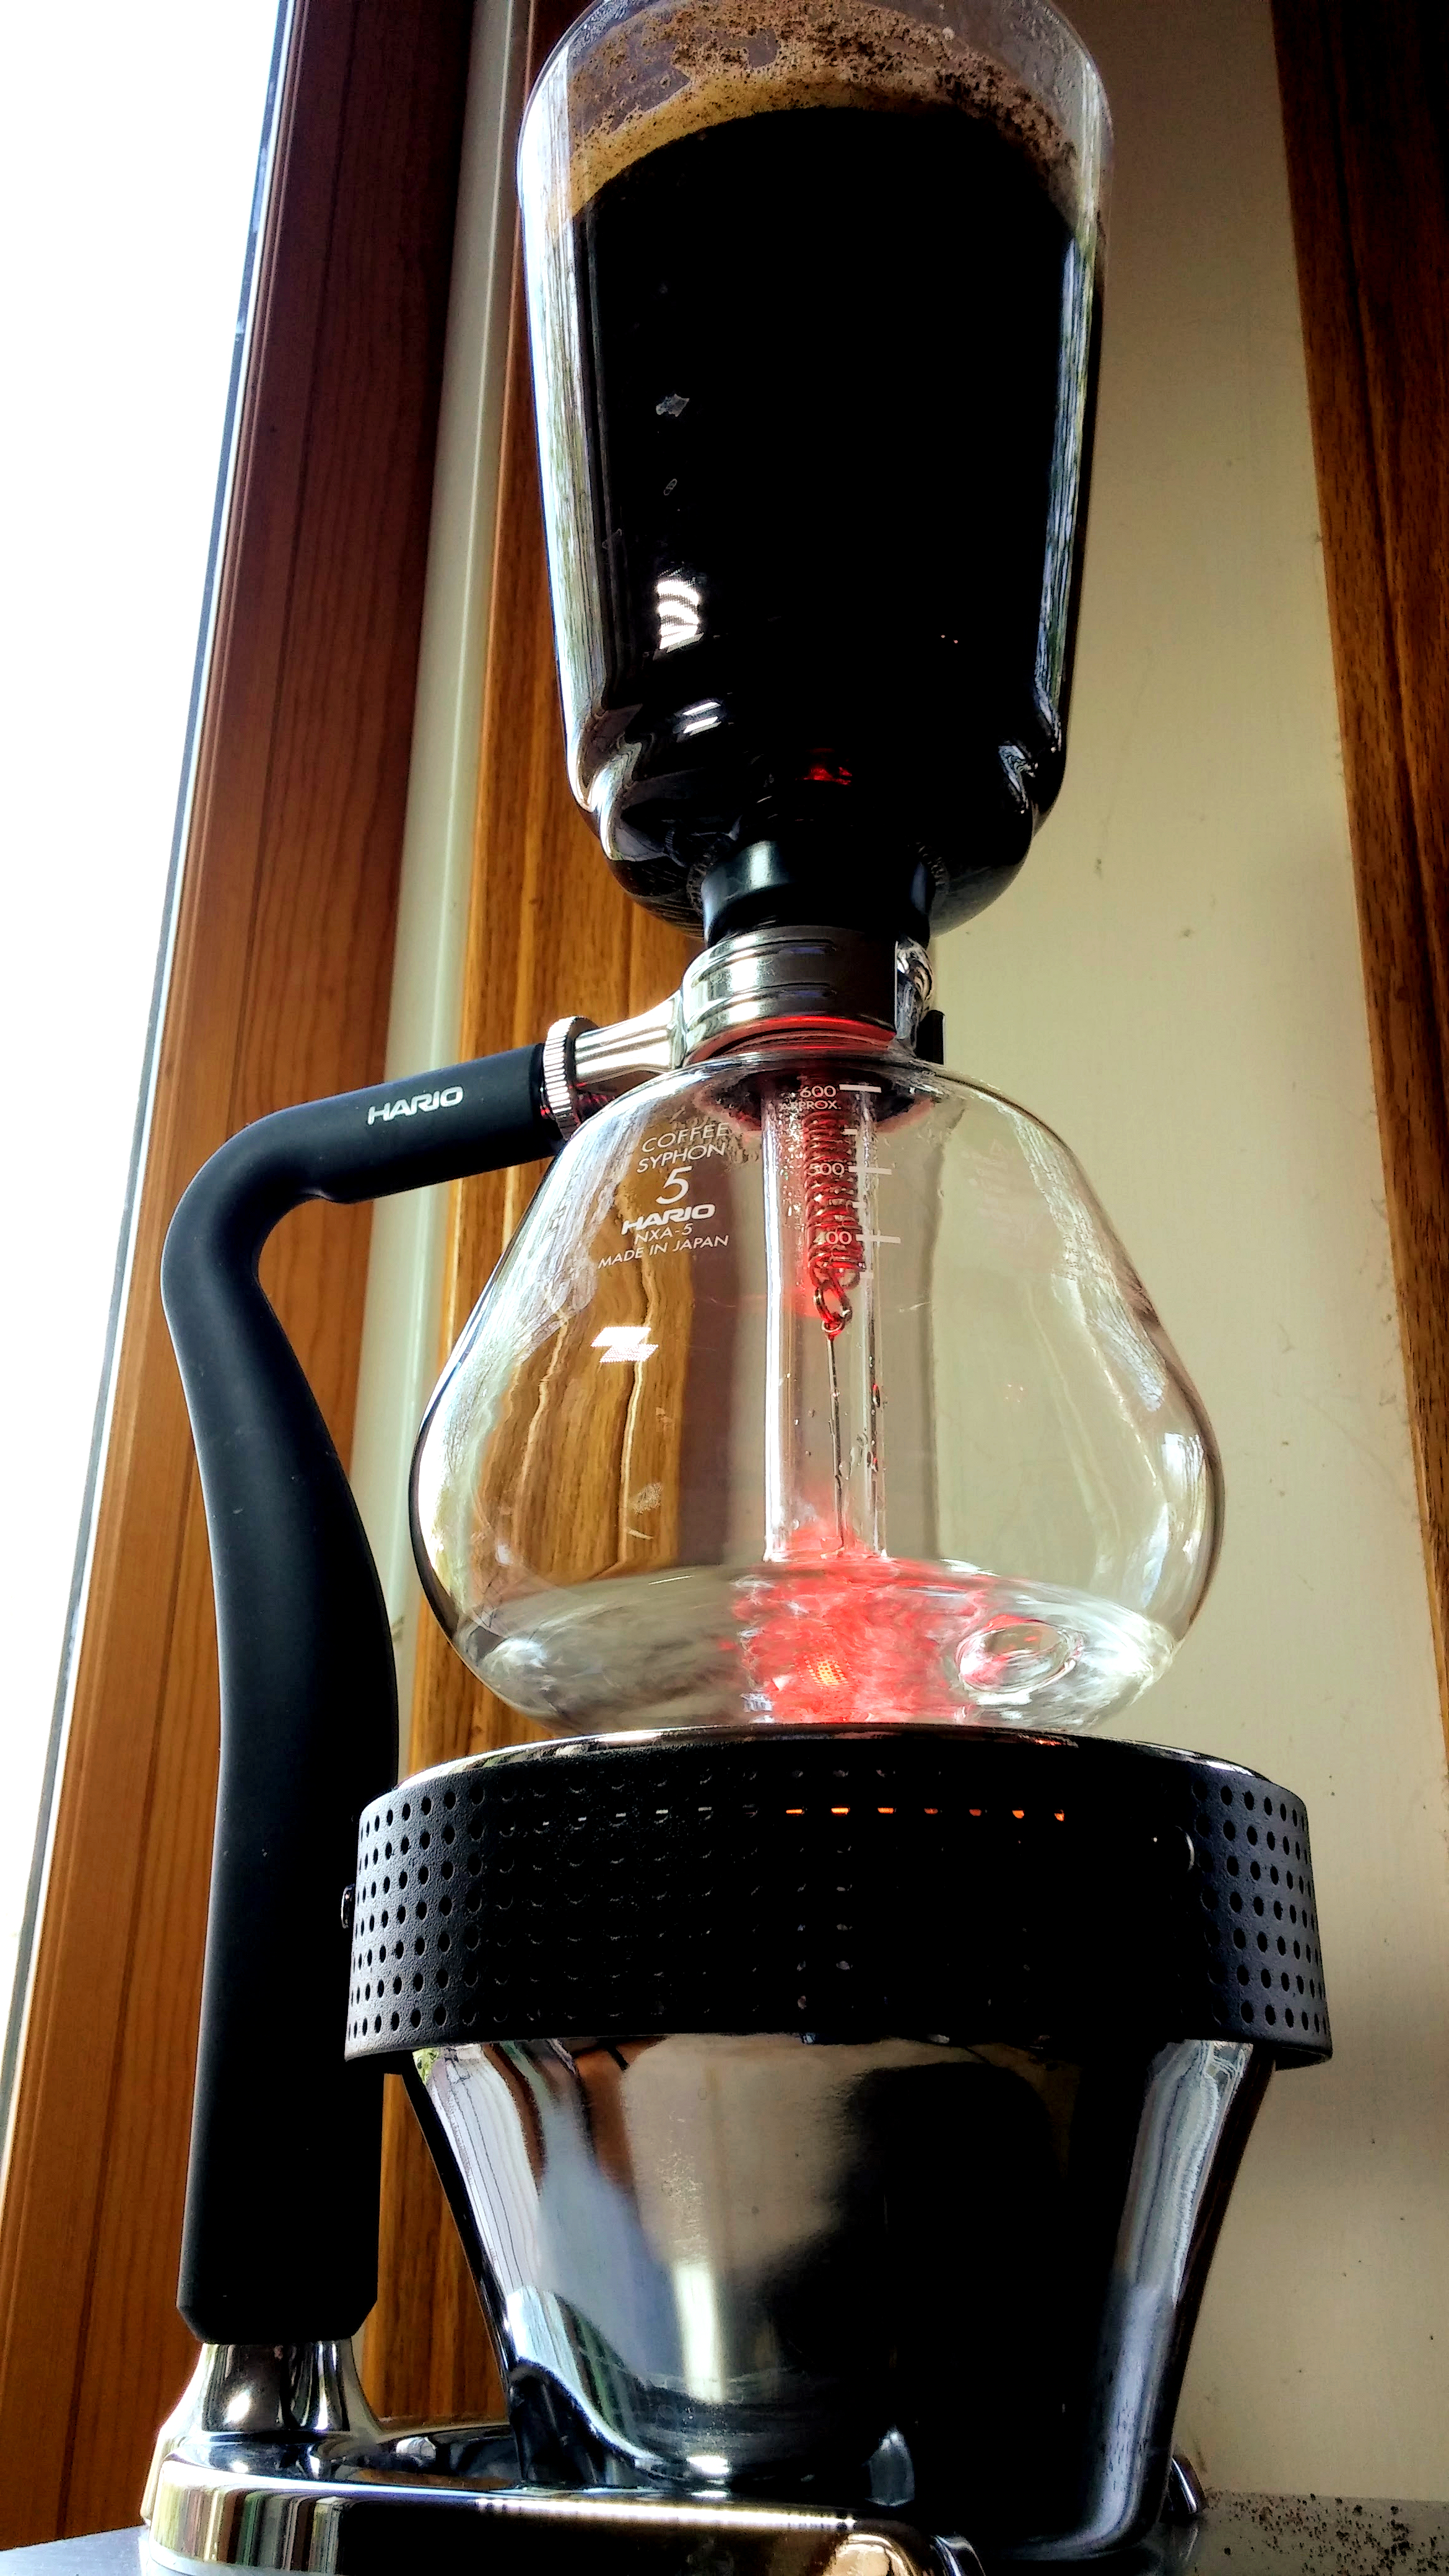
Hario syphon in flight. A beauty isn’t she?
I’ve waited forever to do this review. Why? I don’t know. Words fail me when discussing syphons, which used to be called vacuum makers, glass makers or sometimes percolators. You likely think I mean the dreaded pumping percolator, which became shortened to the single word designation, but I don’t. The two used to be distinguished from each other, but as the vacuum version got phased out, the pumping percolator got called a percolator. Since then, it’s been blamed for virtually taking the coffee industry down, but that’s another story… and blog post!

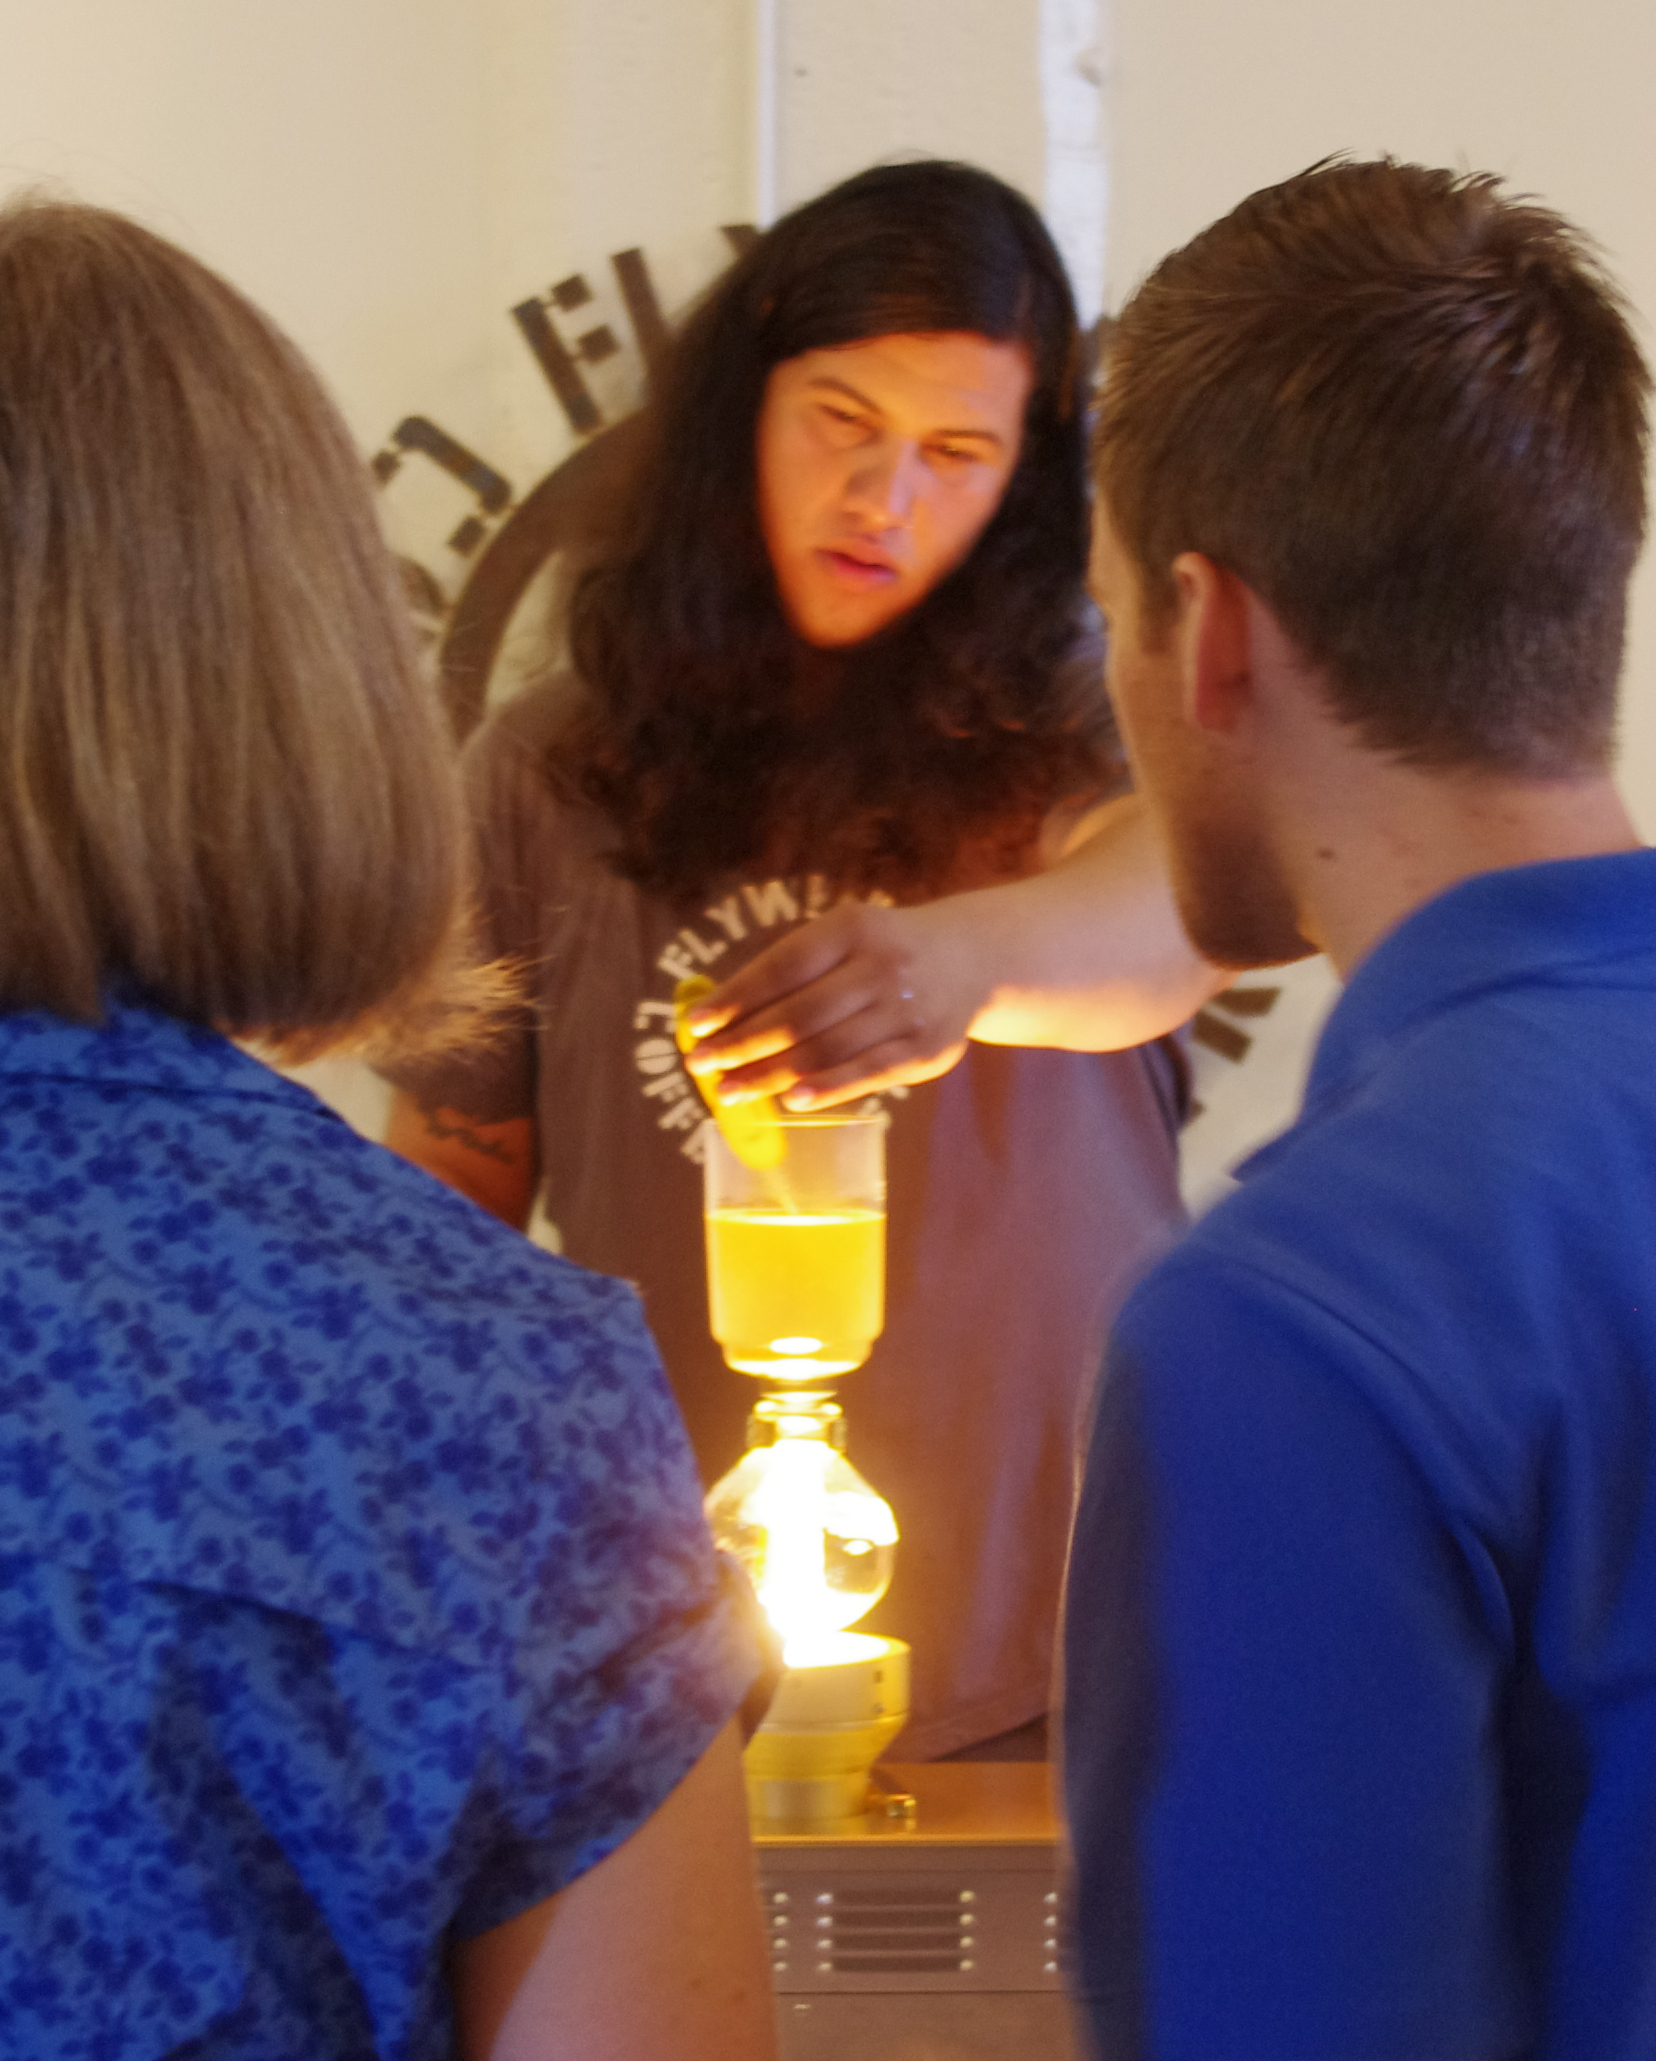
CoffeeCon Syphon class taught by long-time pal Charlie Sarin (thought not pictured). The Syphon is open-ended tech, with different presenters offering their individualized hacks and variations on the theme.
The Hario Syphon is one of two relatively popular and widely available syphon brewers. The other is made by Bodum and deserves its own review. Let’s take the Hario syphon and examine its strengths, and any potential weaknesses. It’s really not hard to understand a syphon. The lower bowl is really a kettle, where the water is heated in order to make coffee. The two bowls are fitted together. Once the water is heated to nearly a boil, hot air in the lower bowl expands, forcing the near-boiling water up through the upper bowl’s tube, through a filter where it starts bubbling as if it’s boiling – it’s not. At this point the barista (at home, you or me) adds finely ground coffee to the upper bowl and stirs it swiftly so it starts the extraction process. After roughly a minute, the siphon is removed from heat and the brewed coffee travels downward, as cooling air in the bowl below creates a vacuum (hence the original name) and drawing the coffee through the filter, where the spent grounds are trapped. When the coffee liquid is all down below, the two bowls are carefully detached (they’re hot!) and the lower bowl simply becomes a serving vessel.
At this point, lots of question should come to mind. For this reason, I’m inserting an FAQ here.
Syphon FAQ
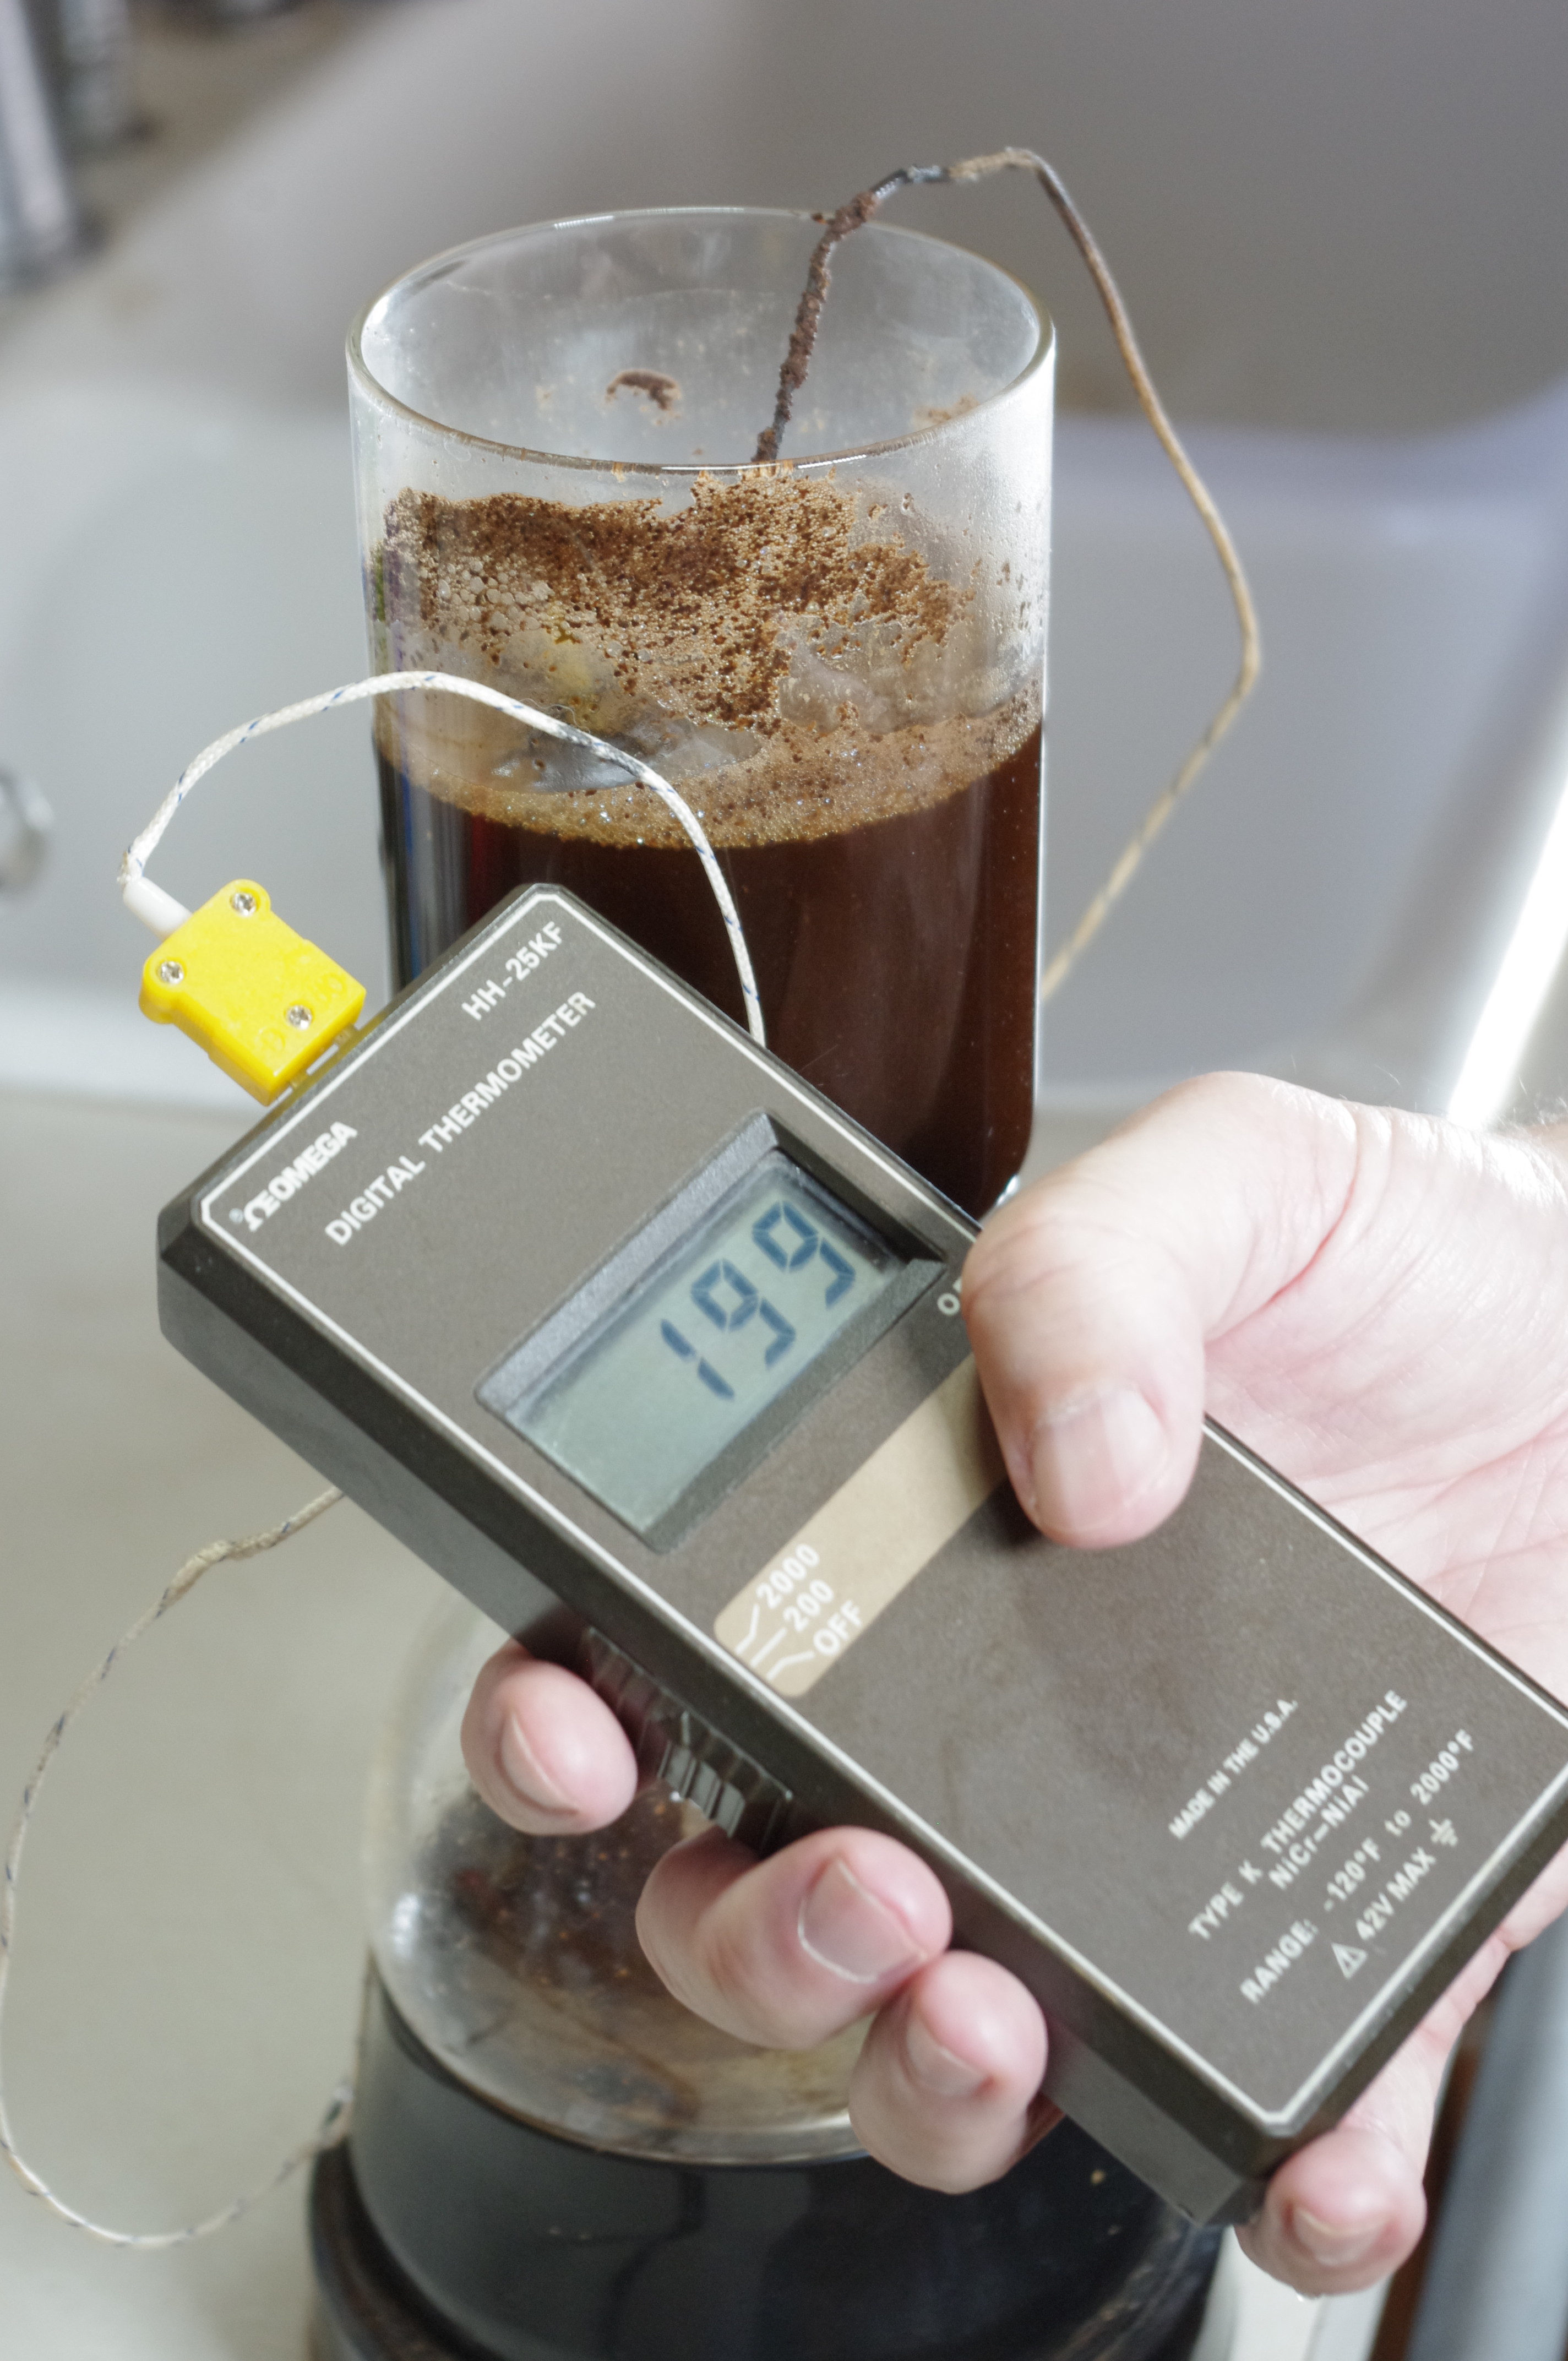
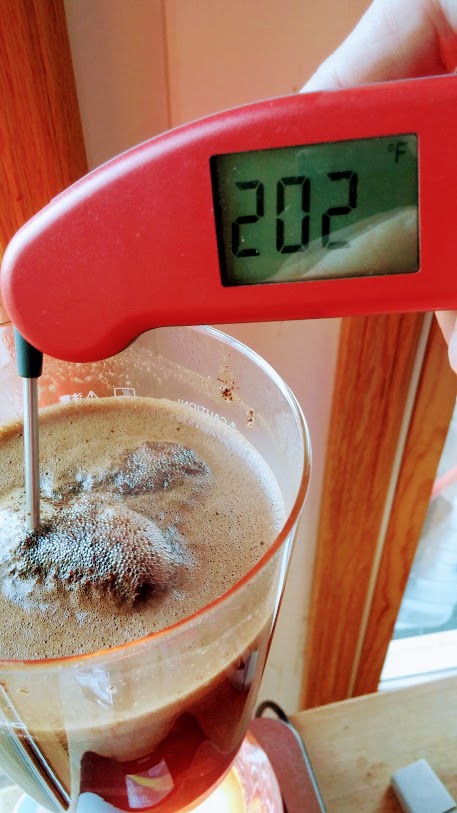
- Does the syphon boil to make coffee? No, the water never boils. It remains at a near-ideal 200°F for the duration of the brewing contact time. The bubbles that appear are more expanding air being released as gas expands in the lower bowl. If just looks like it’s boiling.

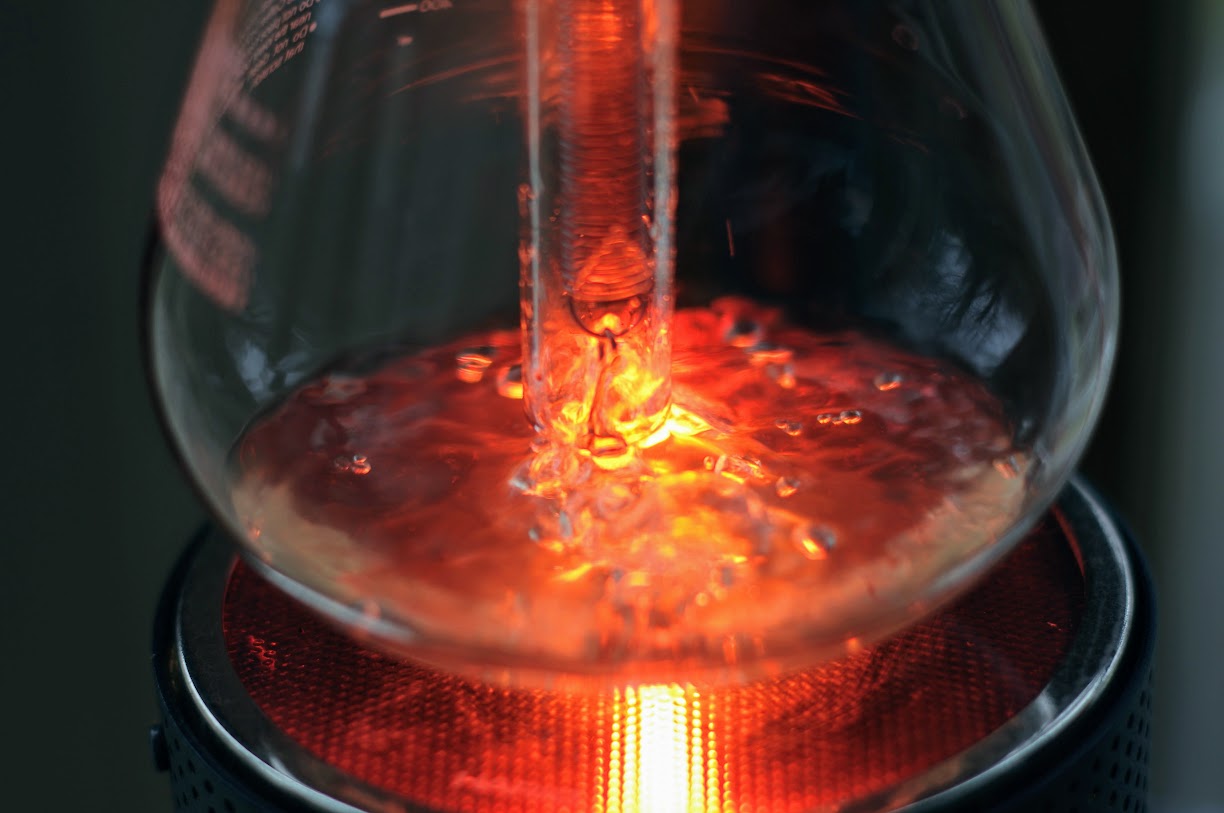
Flame heat is slower, prone to wind, but otherwise effective. Call me a modernist, but I prefer Infrared bean heater for their consistency, ease of use and glamour effect. You simply pull this out when entertaining watch the jaws drop.
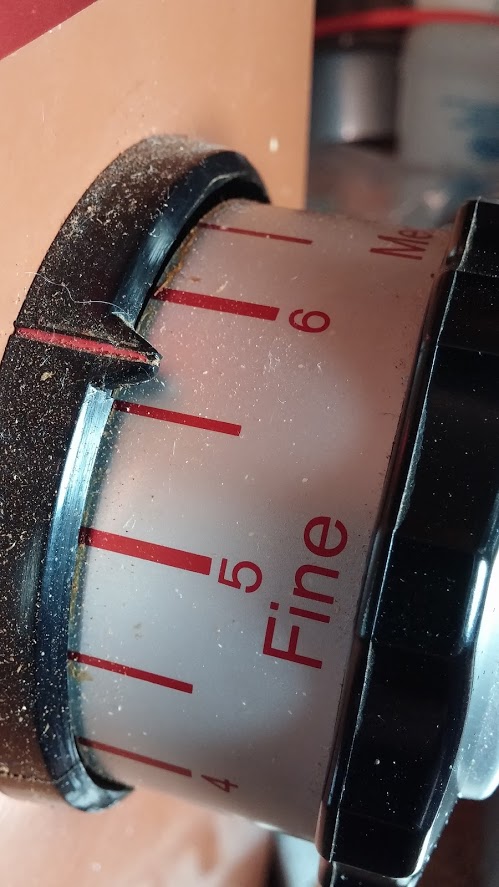
- Why finer than drip grind? The siphon’s contact time between hot water and grounds is roughly two to three minutes, approximately half that of most drip brewers. You can grind finer, which reduces grounds surface area exposed to the hot water and the overall beverage strength will even out. Note: Automatic syphon brewers may take drip grind. Follow your maker’s recommendation.
- How did we get so lucky that the temperature in the upper bowl happens to be 200°F? We didn’t. Truth is, the standards that recommend 200°F brewing temperatures were developed by observing a siphon brewer and measuring its temperature. That temperature became the de facto ideal recommended extraction temperature for various brewing methods. Note, the syphon naturally brews at 200F, but if for some reason you want a lower or higher temperature, you’d best choose another method.
-

Competitor’s syphon compared. All syphons are reliable at achieving 200F brewing temperatures. Differences are durability, capacity and ease of use. Hario’s excels at all three.
Why wait until the water all goes to the top before adding the ground coffee? It’s the most reliable way to time the contact time, which must be done for consistent results. But, you don’t have to. There are several ways to use a siphon. I’m just giving you the one I’ve found works best in my experience.
- No matter how long I wait, all the water never really rises into the upper bowl. What am I doing wrong? Nothing. All the water will never rise into the bowl. Just understand, it doesn’t have to. All the water never needs to be in contact with the grounds. However, all of the grounds do need to be in contact with the water in the upper bowl.
- Is stirring necessary? Yes, I think so. I realize so-called automatic syphons don’t require nor recommend it. These designed used a developed force to propel the water up into the upper bowl and agitate the grounds, which were added before pressing the on button. This simplified method seemed to work, but I think the manual glass method used by Hario (and others) works best when the end user waits for the water to be mostly up in the upper bowl, adding the grounds and immediately stirring to make sure all the grounds are enrolled in the extraction process. The second stir is done because, on occasion, the grounds re-clump together during the minute or so after the initial stir. I realize I’m insisting upon being thorough here, but you may as well learn to do it right. It happens to me often enough that I think it’s worth sharing as a step.
How Did We Test the Hario?
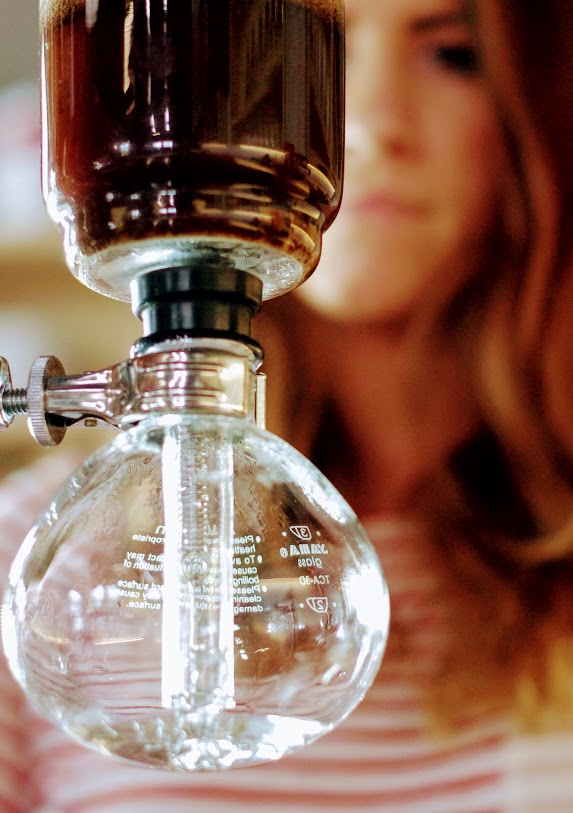
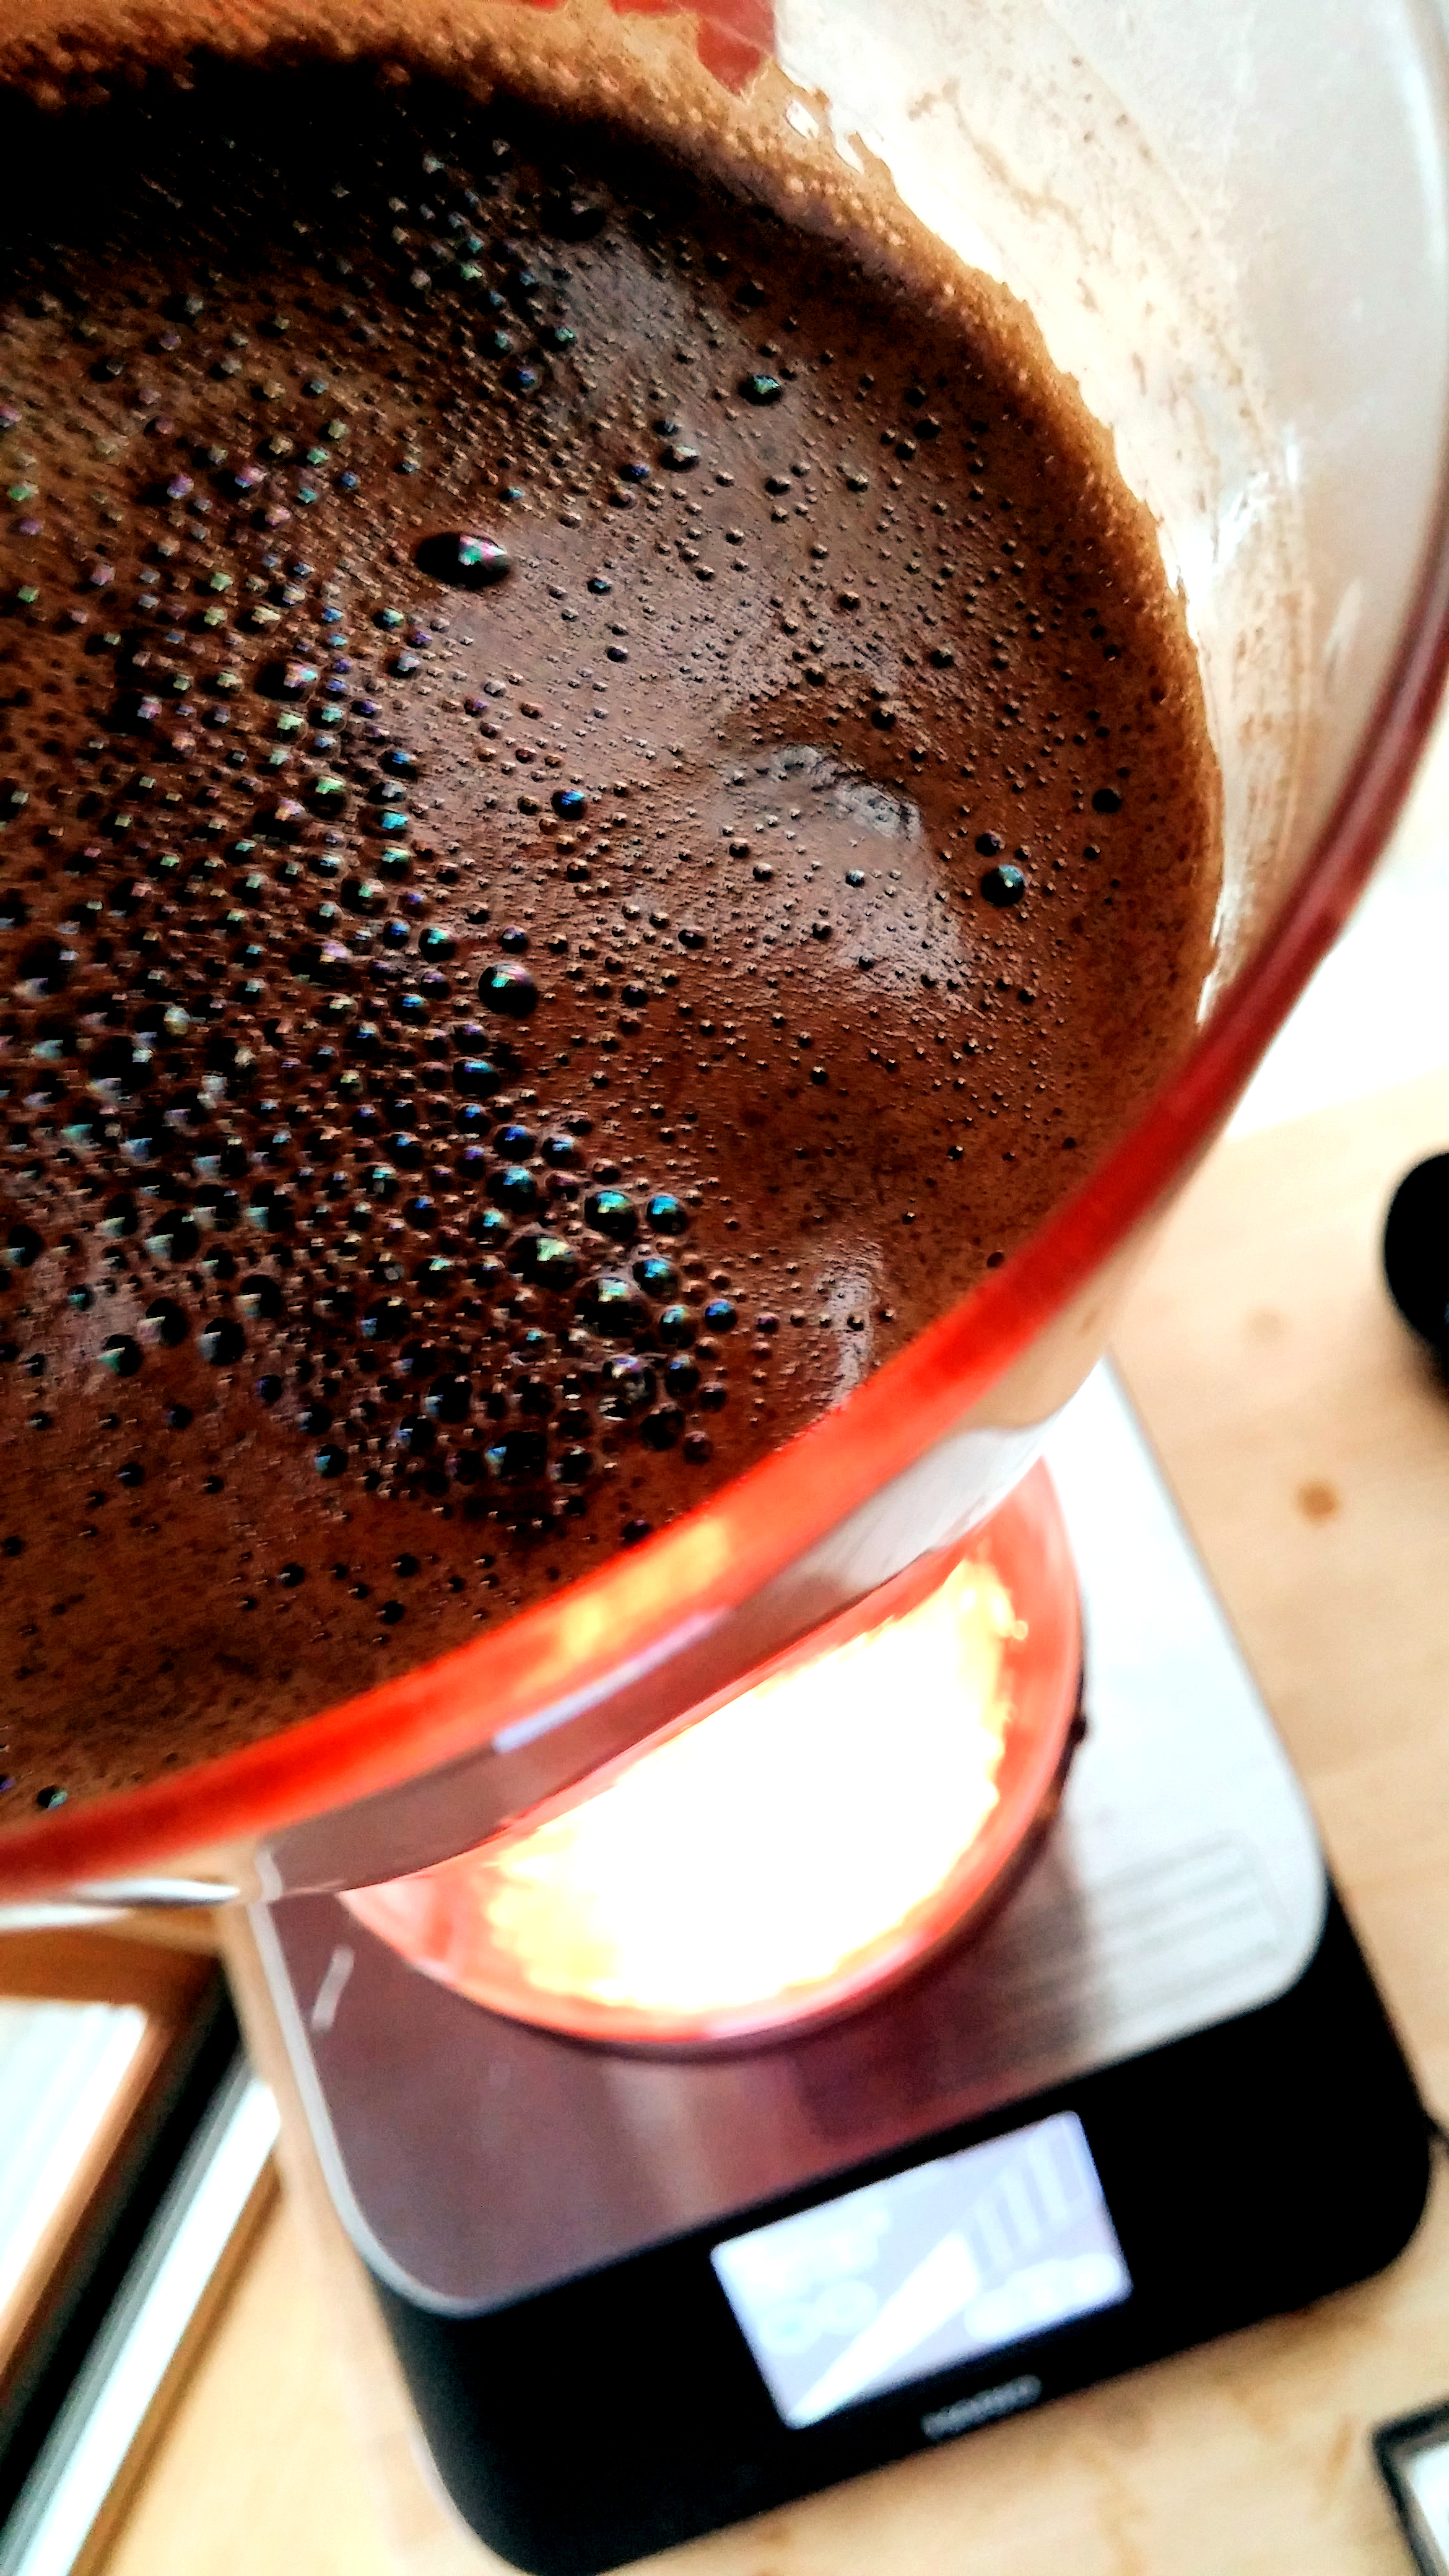
Note bubbling, boiling water in lower bowl during upper bowl brewing. This boiling water has no effect on brewing process, nor is it cause for concern that all the water never attends the extraction process. The syphon brewer is an excellent method.
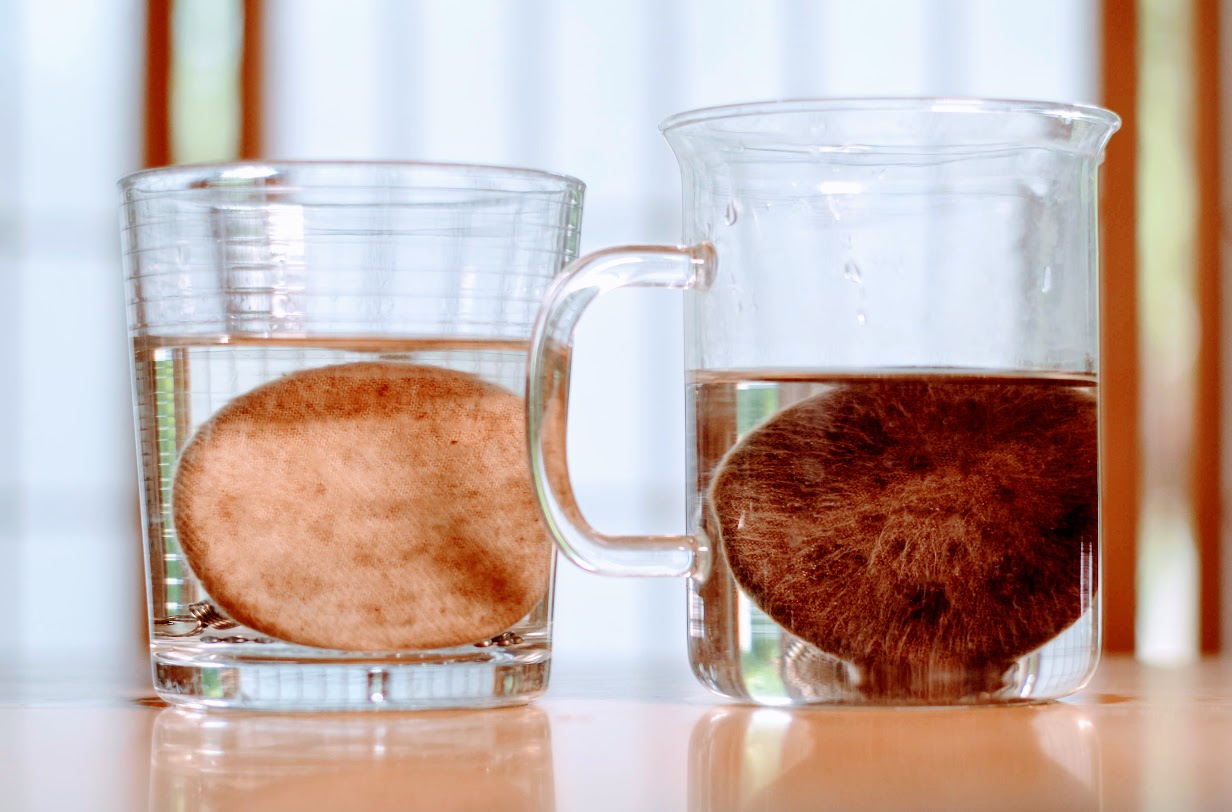
I tested the Hario using it precisely as I described above. However, there are a few options for you to choose. The filter for instance. Hario supplies both a metal permanent filter and a cloth filter. As a long time syphon fan, to me there is no choice. I prefer cloth as the definitive filter of choice with this method. Metal is fine, but it does let some particulate through and into the final cup. While hardly objectionable and certainly never to the point of being described as sludge, I simply prefer the viscosity and taste of coffee filtered by cloth. To me it offers the ultimate coffee mouthfeel. While cloth filters are not permanent, they do last a month or more if carefully rinsed and stored. They take no more care than the metal permanent filter and they are renewable and inexpensive. I misplaced the one that came with the brewer and didn’t have the nerve to request more from Hario. I went online and purchased some from Amazon for around $5 shipped Prime. About a year’s supply for me. I can’t complain.
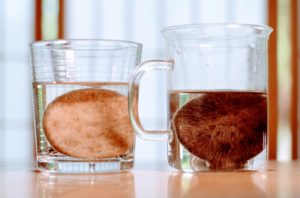
On the left is a fresh cloth filter, after its first use. Right is a two-week-old filter. Notice discoloration begins immediately and darkens with each use, regardless of scrubbing. Works fine regardless. I suggest not worrying about discoloration which seems to have little effect on cup taste.
Don’t be a Purist. The benefits of pre-heating water
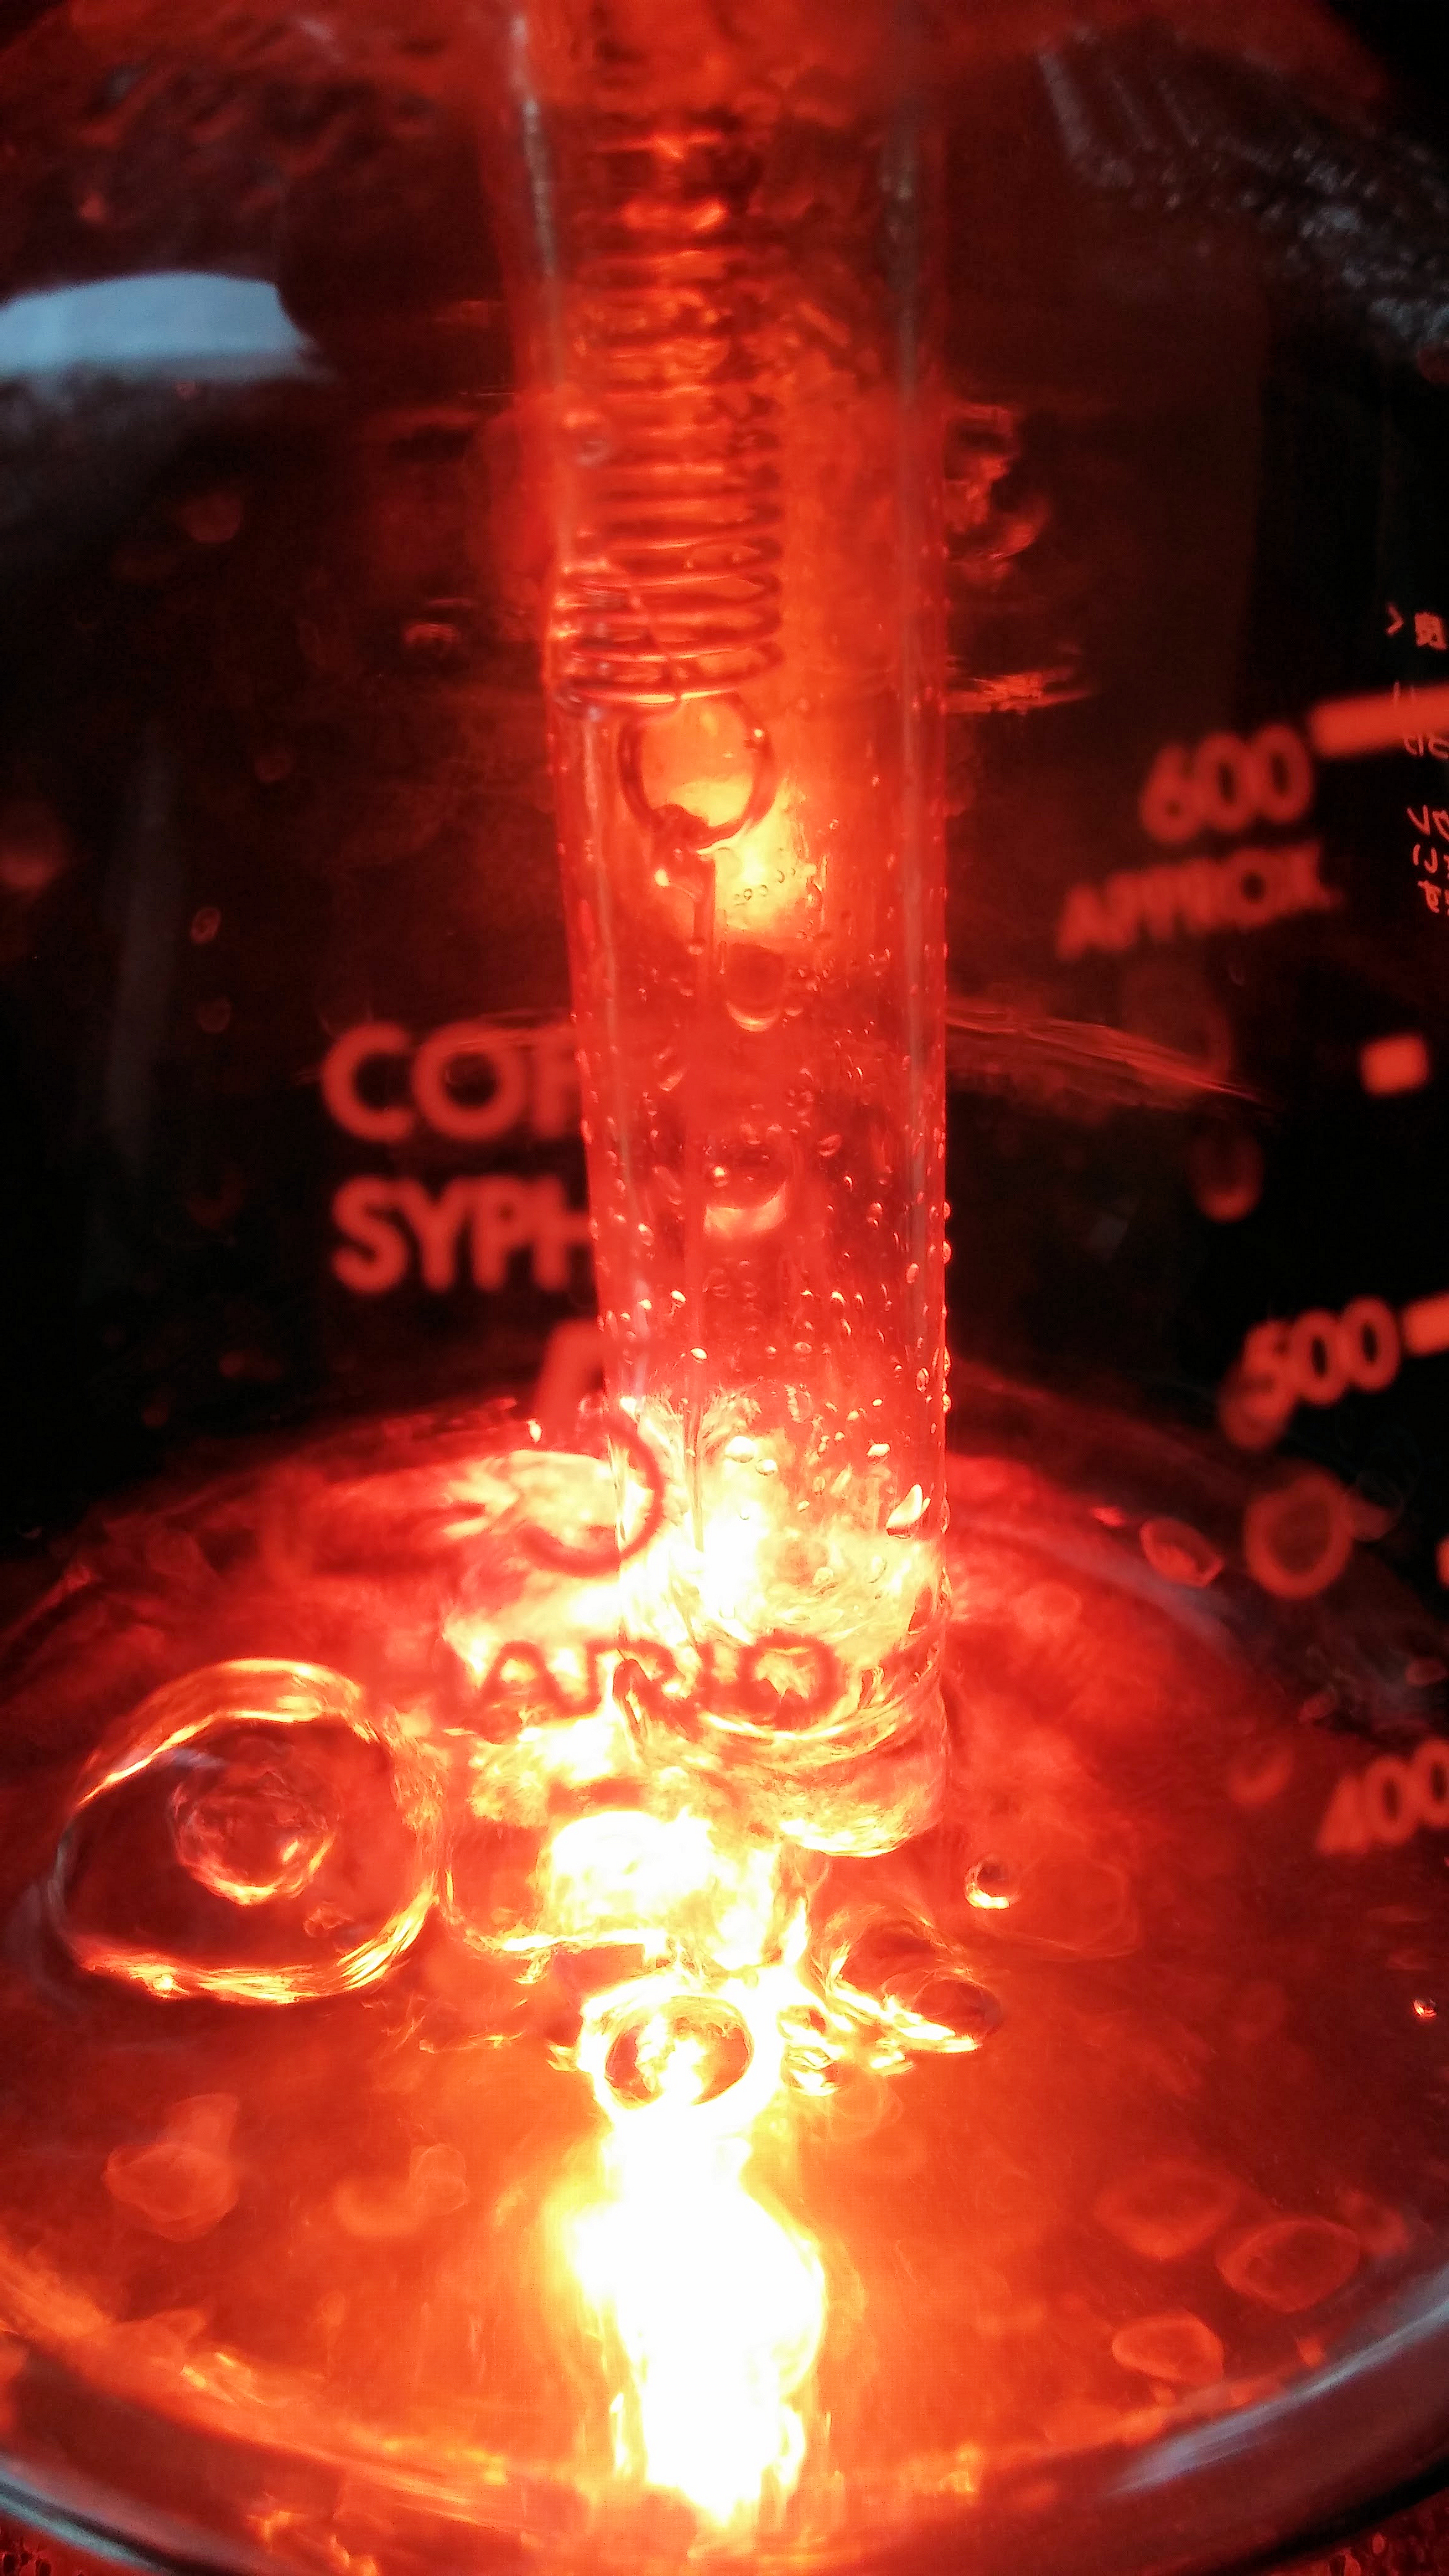
One thing I recommend. Don’t pour cold water directly into the syphon for heating. Boil it in a separate kettle. It saves time and energy. I just used a nearby BonaVita kettle but any one will do. I set it to 203°, my normal drip set temperature and used its gooseneck to carefully pour the near-boiling water into the lower syphon bowl. Then I placed the syphon bowl on a heat source. I guess I qualify as a barista because Hario supplied me with an infrared beam heater. I do not know if these heaters are available to the public, but if they are, I highly suggest one if you are committed to syphon long-term. They are simply so easy to use. They also illuminate the process beautifully. Admit it. Part of the syphon’s allure is its theatrical visual as it does its stuff. The beam heater captures all this in its glory.

Looks like it’s boiling, but it’s not. The upper bowl, where extraction takes place, is typically within a few degrees of 200F. Many consider this ideal contact temperature.
Beam Heaters versus Flame
A check online of beam heaters tells me it’s at this writing a $250 option. Meanwhile a flame lamp is easy and inexpensive at around $30. Frankly, some baristas tell me they think it’s the ideal way to brew with the syphon. More responsive and direct heat using the flame. If you preheat it, it takes very little time. If you don’t, the beam heater is still too slow. Visually, the lamp gives very little to the beam heater. Both make great coffee. Your call.
Is the Syphon Hard to Use?
The Syphon is not hard to use. It does take some effort and attention, but it’s not hard. The method is actually very reliable and, assuming you agree with the industry’s standards, the syphon follows them perfectly. As I said, it was the model for those standards.
Here are a few potential cons to syphon brewing.
- Thorough cleaning. Not dishwasher safe. As far as I know you cannot just pop the Hario syphon parts into our dishwasher. They require hand washing. You need to thoroughly rinse and perhaps use a little mild or unscented detergent to clean a syphon before putting it away after using. It’s not difficult. The Hario syphon is substantial. It is far better made tempered glass than most others I’ve tried over the years. Still, while hot all syphons are more fragile than cold.
- Syphons get hot. I just finished teaching a syphon class at CoffeeCon NY in Brooklyn. There were two small children in the first row. I wasn’t worried at all, but know that I would always use care when brewing in a home with children. The parts get hot, near-boiling water if traveling up and down in the unit. The beam heater or lamp both get even hotter to do their job. It’s not a unit to ever leave unattended. However, I also made stovetop French fries the other evening when my family was over, and all the same risks remain. Same cautions.
- A cloth filter takes an extra step. It must be thoroughly rinsed and a drop of detergent may be helpful as well to keep it free from oil buildup. It never looks clean after initial staining, but practical use has shown me this means little and doesn’t in my opinion compromise its effectiveness in the coffee making process.

Grind fineness depends upon contact time. The Hario typically takes a grind finer than drip coupled with a 3 minute contact time.
Conclusion
Do you need a syphon? Of course not. The question is akin to asking, “Do I really need an iPad? There’s virtually nothing you can do on an iPad you can’t accomplish on a laptop or other mobile device. The point is it’s ideal for some situations and uses. Same with a Syphon. I know of no better, more thorough and reliable extractor of coffee oils than the Syphon. It never needs to be de-limed with citric acid. Its filtration contains little or no plastic that can become smelly with time and use. The syphon is the best method of extracting from all the grounds. No matter how thoroughly you use drip, most drip cone designs contain some “trouble zones” where grounds in those areas are likely to be less extracted. The syphon’s natural bubbling acts as an extraction facilitator, using what Bunn Corporation calls “turbulence” throughout the contact time. The very dry spent grounds observed after the finished coffee beverage has been drawn down below is evidence of the effectiveness of the final separation of brew from grounds of the syphon.
I can’t imagine being a coffee enthusiast without owning a syphon. And, Hario makes one of the best; perhaps the best.
Podcast: Play in new window | Download
Subscribe: Android | Email |
by Coffee Kevin | Jun 16, 2016 |
 The Hario Syphon is perhaps the ultimate quality siphon, also long-known as a vacuum coffee maker. The Syphon works on the principal that near-boiling hot water in an enclosed lower vessel releases steam that expands, forces the hot water up through a tube into the upper bowl, where it is inherently the right temperature to brew coffee. As long as the lower bowl is kept heated, the water will stay up there, brewing coffee. The bubbling below causes the water in the upper bowl’s water to agitate the grounds, facilitating the extraction process. When the operator decides enough is enough, she simply removes all heat below and within about a minute the cooling and contracting vapors below cause the lower bowl to suck (hence the word vacuum) the finished brew back down into the lower bowl. Oh, did I mention there is always a filter between the two bowls? Haha, that alone is worth a patent. Siphons vary in the heating method (earliest samples were flame powered) material (glass is original and common, metal durable but no theater, plastic combines both benefits but it’s plastic) and filter type. The filter type is likely the most important of the variables to affect taste, and I’ll go into that later.
 Should history ever agree to repeat itself in a different order, I’ve long felt the siphon would have been the ideal brewer to replace drip. After all, the siphon fixes the following drip issues:
- Grounds to Water Ratios remain constant when making different size batches.
- Easy to maintain in-standard brewing temperature.
- Grind is less critical because it has no effect on contact time.
There may be other benefits too. But, in an effort to keep this review from taking my record for the all-time windiest, let’s now cut to our Hario version on the test bench. It’s a beauty all right. I promise not to let looks intoxicate me, but as with my marriage, I’m a sucker for looks. And this one’s a knockout. But, can it make coffee? And how! The Hario Syphon and its companion infrared heater are amazingly competent in that ability. This is a completely professional kit for any barista. Best of all, for the well-heeled devotee, it offers perhaps the ultimate home siphon setup.  You get:
- A lower bowl on a sturdy metal stand. The glass is clearly a thick, robust, tempered type. The upper bowl’s stem (in my experience) is often prone to breakage, but with this unit so far, no such problem.
- Two filter types. You get the original cloth filter, that is most effective and (I think) the original method, offering the cleanest, clearest coffee. You also get a Hario-designed metal filter which effectively filters and apparently matches the flow rate of the cloth one, so they are interchangeable. More sediment but that’s what metal filters do. Much more convenient.
- Infrared heat. To me flames take too long, the liquid fuel is a hassle and flames vary in temperature due to air flow. To be honest, infrared still isn’t fast enough for me, but it looks beautiful and is wind resistant.
Say What You Think, Kev… I absolutely think this siphon is the best one I’ve yet used and I’ve used lots of them. It brews some of the best coffee I’ve ever had, which is saying a lot. But……… all siphon brewers I’ve yet tested have the following potential issues:
- Variable contact time. Try though I may, I find the idea of shutting off the heat and then expecting the coffee to dutifully drop back through that filter to the bottom again varies a bit. I’ve done pretty well overall. After some practice with this unit I was able to get a four minute contact time within fifteen seconds most of the time… but, not always. Compared to drip or other full immersion methods such as French press, the siphon varies more and I see no solution to this. I made one last batch before starting to write this review and I had a nearly six minute extraction. The coffee still tasted fine, but it is worth noting for those to whom it matters.
- The cloth filter is a hassle. Not this one in particular. All of them. If you’re an occasional user, it’s practically a no-go as storing the cloth filter requires cold water, a spot in the refrigerator to keep it cold, and frequent water replenishment. If you use the cloth filter often they are prone to absorbing built-up coffee tastes. The stainless filter, which I admit I used for most of my testing, allows fine sediment through. Paper, my personal filter material first choice is not an option. (Update: See below under tweaks for just such an option.)
- Heating, even with the fancy infrared heat source, is not fast. Compared to coffee brewers such as Bunn’s Phase Brew, Kitchen Aid’s KCM0802, OXO’s 12-cup Barista Brain and others that get the water to SCAA certified brew temps before contact begins, the room-to-ideal temperature on this siphon brewer using the Infrared heater is roughly ten minutes. Too long. I learned quickly to heat the water in a separate kettle first. Solves the problem and not that big a hassle, but still an extra step.
 So, recommended or not? I will never knowingly write anything but the truth in this blog. While I acknowledge that this brewer still requires more active concentration from the end user, I also know it makes some of the best coffee I’ve yet tasted. No getting around it. For ultra-fresh coffee, very good quality coffee, roasted to its more flavorful degree, the Hario Syphon does a unique job. Carefully used, you can get a very thorough extraction, full of fruit and complexity. You truly feel you are tasting deep into the coffee. So, yes, highly recommended, with the caveat that you must become part of the task of brewing it. It is not yet truly automated in this product, and if used in a way that is automated, you are, in my opinion, giving up flavor in exchange. How Do I Use It? There are lots of ways to use a siphon or vacuum brewer. Here’s my personal method.
- Heat four cups of water in an electric kettle to 200°F.
- Weigh 38 grams fresh roasted beans and grind them a coarser than auto-drip but a notch or two finer than for Chemex drip (coarse).
- Once water is heated to 200°F, transfer it to the empty glass bottom half and place on infrared heater. Turn heater on to maximum or one notch less.
- Place empty upper mixing vessel with filter inserted into lower half so that they fit snugly together.
- After water has completely risen scoop or pour grounds into top half. Very gently stir near top to ensure all grounds are wet. Start timer.
- At one minute begin another few seconds of stirring. Do not stir downward, as I found if you do, there’s a risk that some amount of brewed coffee will work itself down into the bottom half. Reduce heat a few notches after stirring.
- At two minutes stir gently again. Lower heat a notch or two.
- At three minutes, stir one last time.
- At around three-twenty, turn off heat. After a few seconds, the coffee will begin its final descent into the lower bowl, which becomes a server upon completion.
- When the coffee has completely returned to the bottom, carefully unplug the upper bowl, remove it and place it in the top coffee, which when upside down, becomes a holder for the spent grounds.
- Serve.
Tweaks
You should know that I notice a significant difference between using a cloth and metal filter. The cloth does a more thorough job removing grounds, some might say ideal, although I’ve been around coffee long enough to know that ideal is a subjective term. Let’s just say it’s my favorite. At the recent CoffeeCon NY festival I noticed Georgio’s Coffee’s Georgio Testarossa using a siphon to brew his own delicious fresh-roasted coffee. I also noticed the brew’s viscosity matched my own using the cloth filter. I asked if he was using cloth. “No, paper”, he responded. “Paper”, I exclaimed. Then he disassembled his filter to reveal how he’d cut matching circles from a Bunn filter. 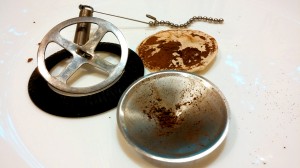 Some people use fine grind for vacuum. I used to, but lately I’ve found a coarser grind to work best. Siphons can use any grind as grind really does little to affect contact time. Of course surface area exposure affects the taste strength; that remains. Using the metal filter I find the coarse grind reduces particles in your cup. I use close to what I’d use for regular drip.
Conclusion
The Hario Syphon is a gorgeous brewer that can make state-of-the-art coffee. I had both the single-knob and digital control base units. I found each to work well. The digital control unit will appeal to anyone who enjoys its programmable features, although to be honest, I didn’t explore them. Different article. The filter options are enough to make me choose this vacuum unit. I never felt the glass was fragile and had no incidents nor near-incidents during my tests. About the only thing missing compared to drip pour-over such as a Hario V60 is the ease of controlling brewing temperature. Vacuum/siphon is high-temperature brewing, inherent in the process. But the results are impressive. Any time during my time with this unit that anyone came to visit they immediately noticed the unit. Whenever I offered to make coffee and asked if they had a preference, the unanimous response was to point directly at the Syphon and say, “That one!”
Unhesitatingly, highly recommended.
by Coffee Kevin | Jun 5, 2013 |
 This is as much a story about social media as a coffee brewer review. I first read about the Diguo TCA-C3 Siphon in a post by its Chinese manufacturer on LinkedIn. I was instantly enthused and invited them to CoffeeCON 2013. Next thing I knew they brought the spanking new brewer to CoffeeCON 2013, where is was a definite attention getter. The Diguo TCA-C3 is a glass siphon that makes three five-ounce cups of coffee. This is about one cup short of idea, but it’s perfect for a couple of cups of coffee.
Everyone’s calling them siphons but they have been known as vacuum makers for many years. The concept is: Water is heated in a sealed lower container. As it heats the steam pressure forces near boiling water up through the center tube into the upper bowl. The upper bowls mixes with grounds in as the pressure from the lower bowl keeps feeding it air bubbles, resulting in a nice agitation during brewing. When the heat shuts off the brewed coffee returns through a filter, in this case cloth, and the brew is hot, almost too hot, but beautifully extracted. Vacuum brewing is among my favorite methods. I chose it to demonstrate in my Coffee Brewing Secrets DVD released five years ago.
What’s new – The Diguo TCA C3 offers semi-automatic vacuum making. This is great because if you’re used to heating one up using an alcohol lamp, you already know how long it can take. The procedure with this unit is easy and straightforward.
How to use it – You simply put fresh water to the fill line in the lower bowl. Then turn the dial up to maximum to start heating the water. While it heats up, take the cloth-covered metal filter and install it, using the spring to secure it to the inside of the upper bowl’s tube.
At just over five minutes you’ll notice bubbling in the lower bowl, the water is at or near boiling. Once it boils, Lower the temperature dial to about half way (12:00 o’clock) and put the two bowls together. All this takes longer to write than to do. I’m sure I’m over communicating but after a couple of times you will find it easy to perform.
Once the bowls are joined and sealed, the water from the lower one will start rising into the upper bowl. Once the water has risen into the top bowl, add the ground coffee. Be a little careful if the coffee is ultra fresh as it may foam up and cause a messy overflow. If it does this, know that it’s happened to everyone who uses a vacuum method at least once.
The moment the grounds and water are in contact, start noting the time. Also start stirring the grounds and water together with the supplied stirring rod/scoop to facilitate mixing and to ensure the grounds all come in contact with water as soon as possible, as they grounds cannot being extracting their oils until they are wet. At just before 3 minutes contact time, shut off the heat power completely. The coffee will continue sitting up there and bubbling for around 10 to 15 seconds as if nothing’s happend – it takes a moment for the bottom bowl’s air to cool enough to contract. Then the finished coffee will begin its descent through the filter and into the lower bowl.
The coffee will be sucked back down through the cloth filter, hence the term vacuum. Once the coffee is completely down in the lower bowl, carefully remove the upper bowl (it is hot and may even be slippery) and place it in the black lid, which when turned upside down is a stand.
If all this was done right, it took a total of four minutes for your coffee to be extracted, perfect for the fine grind you chose. You are ready to enjoy your coffee.
If you’ve never had siphon coffee you’re in for a treat. Unlike drip method the grind is only used to expose more surface area. It does nothing to control contact time. Freed of this second responsibility you can experiment with different grind sizes to suit your palate. I use a quite fine grind.
My tests were performed with lighter roast coffees. I had Metropolis Coffee’s Sulawesi and reliably made many batches. It seemed each time I made three cups, a fourth person would show up and I’d make another batch, which allowed me to test consistency. Overall it was very consistent as long as I followed the same procedure and timing. I called it semi-automatic because you are required to shut off the temperature control when you wish to coffee to be done. I realize for some this will be a deal breaker. They are entitled but they are missing a much better cup of coffee, night and day superior to a Keurig machine and matching the best pourover.
A siphon cup differs from a pourover drip cup in the following ways:
- Hotter beverage temperature. If you like a steaming hot cup of coffee or find a Chemex cup too tepid to add cream, you’ll appreciate this.
- Heightens acidity, but never acrid-tasting. If you’ve found some lighter roasts too bright and acrid (sour) tasting you may find the higher overall brewing temperature of siphon brewers maintains the cup brightness minus that acrid note that I think is more pronounced when brewing at lower temperatures.
- The cloth filter matches the superclean mouthfeel of the best paper filter (think: Chemex) but with just that slight extra viscosity you can only get using cloth and that paper filter manufacturers keep trying to emulate doing things like poking micro holes into their filters.
The darkest coffee I used was Oren’s Sumatra. This is my favorite Sumatra Lintong ever from Oren. I was beginning to think he and I had a different idea of what’s perfect for Sumatra taste and then I took a sip of this coffee. Those who fear the siphon will be overlit or harsh due to the powerful air infusion during contact time can rest easy. It’s just a perfect cup. While I didn’t have anything resembling a French roast or darker during my test phase, I wouldn’t hesitate to try it out. However, if you’re a dark roast fan, I suspect you will find non-turbidity Presses or the Sowden SoftBrew will be more your cup of… coffee.
The last piece of maintenance advice is a bit of a hassle but I assure you it’s worth the hassle. Thoroughly rinse your cloth filter after each use, perhaps with a drop of Dawn or Free and Clear dish detergent just to enzymatically remove any traces of coffee oils. Cloth filters get rancid easily, their main drawback. You need not disassemble it. Keep it tucked away in a water-filled glass jar in the refrigerator. Never let it dry out.
Highly recommended to the coffee aficionado.