by Coffee Kevin | Jun 16, 2016 |
 The Hario Syphon is perhaps the ultimate quality siphon, also long-known as a vacuum coffee maker. The Syphon works on the principal that near-boiling hot water in an enclosed lower vessel releases steam that expands, forces the hot water up through a tube into the upper bowl, where it is inherently the right temperature to brew coffee. As long as the lower bowl is kept heated, the water will stay up there, brewing coffee. The bubbling below causes the water in the upper bowl’s water to agitate the grounds, facilitating the extraction process. When the operator decides enough is enough, she simply removes all heat below and within about a minute the cooling and contracting vapors below cause the lower bowl to suck (hence the word vacuum) the finished brew back down into the lower bowl. Oh, did I mention there is always a filter between the two bowls? Haha, that alone is worth a patent. Siphons vary in the heating method (earliest samples were flame powered) material (glass is original and common, metal durable but no theater, plastic combines both benefits but it’s plastic) and filter type. The filter type is likely the most important of the variables to affect taste, and I’ll go into that later.
 Should history ever agree to repeat itself in a different order, I’ve long felt the siphon would have been the ideal brewer to replace drip. After all, the siphon fixes the following drip issues:
- Grounds to Water Ratios remain constant when making different size batches.
- Easy to maintain in-standard brewing temperature.
- Grind is less critical because it has no effect on contact time.
There may be other benefits too. But, in an effort to keep this review from taking my record for the all-time windiest, let’s now cut to our Hario version on the test bench. It’s a beauty all right. I promise not to let looks intoxicate me, but as with my marriage, I’m a sucker for looks. And this one’s a knockout. But, can it make coffee? And how! The Hario Syphon and its companion infrared heater are amazingly competent in that ability. This is a completely professional kit for any barista. Best of all, for the well-heeled devotee, it offers perhaps the ultimate home siphon setup.  You get:
- A lower bowl on a sturdy metal stand. The glass is clearly a thick, robust, tempered type. The upper bowl’s stem (in my experience) is often prone to breakage, but with this unit so far, no such problem.
- Two filter types. You get the original cloth filter, that is most effective and (I think) the original method, offering the cleanest, clearest coffee. You also get a Hario-designed metal filter which effectively filters and apparently matches the flow rate of the cloth one, so they are interchangeable. More sediment but that’s what metal filters do. Much more convenient.
- Infrared heat. To me flames take too long, the liquid fuel is a hassle and flames vary in temperature due to air flow. To be honest, infrared still isn’t fast enough for me, but it looks beautiful and is wind resistant.
Say What You Think, Kev… I absolutely think this siphon is the best one I’ve yet used and I’ve used lots of them. It brews some of the best coffee I’ve ever had, which is saying a lot. But……… all siphon brewers I’ve yet tested have the following potential issues:
- Variable contact time. Try though I may, I find the idea of shutting off the heat and then expecting the coffee to dutifully drop back through that filter to the bottom again varies a bit. I’ve done pretty well overall. After some practice with this unit I was able to get a four minute contact time within fifteen seconds most of the time… but, not always. Compared to drip or other full immersion methods such as French press, the siphon varies more and I see no solution to this. I made one last batch before starting to write this review and I had a nearly six minute extraction. The coffee still tasted fine, but it is worth noting for those to whom it matters.
- The cloth filter is a hassle. Not this one in particular. All of them. If you’re an occasional user, it’s practically a no-go as storing the cloth filter requires cold water, a spot in the refrigerator to keep it cold, and frequent water replenishment. If you use the cloth filter often they are prone to absorbing built-up coffee tastes. The stainless filter, which I admit I used for most of my testing, allows fine sediment through. Paper, my personal filter material first choice is not an option. (Update: See below under tweaks for just such an option.)
- Heating, even with the fancy infrared heat source, is not fast. Compared to coffee brewers such as Bunn’s Phase Brew, Kitchen Aid’s KCM0802, OXO’s 12-cup Barista Brain and others that get the water to SCAA certified brew temps before contact begins, the room-to-ideal temperature on this siphon brewer using the Infrared heater is roughly ten minutes. Too long. I learned quickly to heat the water in a separate kettle first. Solves the problem and not that big a hassle, but still an extra step.
 So, recommended or not? I will never knowingly write anything but the truth in this blog. While I acknowledge that this brewer still requires more active concentration from the end user, I also know it makes some of the best coffee I’ve yet tasted. No getting around it. For ultra-fresh coffee, very good quality coffee, roasted to its more flavorful degree, the Hario Syphon does a unique job. Carefully used, you can get a very thorough extraction, full of fruit and complexity. You truly feel you are tasting deep into the coffee. So, yes, highly recommended, with the caveat that you must become part of the task of brewing it. It is not yet truly automated in this product, and if used in a way that is automated, you are, in my opinion, giving up flavor in exchange. How Do I Use It? There are lots of ways to use a siphon or vacuum brewer. Here’s my personal method.
- Heat four cups of water in an electric kettle to 200°F.
- Weigh 38 grams fresh roasted beans and grind them a coarser than auto-drip but a notch or two finer than for Chemex drip (coarse).
- Once water is heated to 200°F, transfer it to the empty glass bottom half and place on infrared heater. Turn heater on to maximum or one notch less.
- Place empty upper mixing vessel with filter inserted into lower half so that they fit snugly together.
- After water has completely risen scoop or pour grounds into top half. Very gently stir near top to ensure all grounds are wet. Start timer.
- At one minute begin another few seconds of stirring. Do not stir downward, as I found if you do, there’s a risk that some amount of brewed coffee will work itself down into the bottom half. Reduce heat a few notches after stirring.
- At two minutes stir gently again. Lower heat a notch or two.
- At three minutes, stir one last time.
- At around three-twenty, turn off heat. After a few seconds, the coffee will begin its final descent into the lower bowl, which becomes a server upon completion.
- When the coffee has completely returned to the bottom, carefully unplug the upper bowl, remove it and place it in the top coffee, which when upside down, becomes a holder for the spent grounds.
- Serve.
Tweaks
You should know that I notice a significant difference between using a cloth and metal filter. The cloth does a more thorough job removing grounds, some might say ideal, although I’ve been around coffee long enough to know that ideal is a subjective term. Let’s just say it’s my favorite. At the recent CoffeeCon NY festival I noticed Georgio’s Coffee’s Georgio Testarossa using a siphon to brew his own delicious fresh-roasted coffee. I also noticed the brew’s viscosity matched my own using the cloth filter. I asked if he was using cloth. “No, paper”, he responded. “Paper”, I exclaimed. Then he disassembled his filter to reveal how he’d cut matching circles from a Bunn filter. 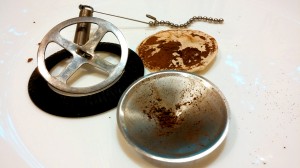 Some people use fine grind for vacuum. I used to, but lately I’ve found a coarser grind to work best. Siphons can use any grind as grind really does little to affect contact time. Of course surface area exposure affects the taste strength; that remains. Using the metal filter I find the coarse grind reduces particles in your cup. I use close to what I’d use for regular drip.
Conclusion
The Hario Syphon is a gorgeous brewer that can make state-of-the-art coffee. I had both the single-knob and digital control base units. I found each to work well. The digital control unit will appeal to anyone who enjoys its programmable features, although to be honest, I didn’t explore them. Different article. The filter options are enough to make me choose this vacuum unit. I never felt the glass was fragile and had no incidents nor near-incidents during my tests. About the only thing missing compared to drip pour-over such as a Hario V60 is the ease of controlling brewing temperature. Vacuum/siphon is high-temperature brewing, inherent in the process. But the results are impressive. Any time during my time with this unit that anyone came to visit they immediately noticed the unit. Whenever I offered to make coffee and asked if they had a preference, the unanimous response was to point directly at the Syphon and say, “That one!”
Unhesitatingly, highly recommended.
by Coffee Kevin | Jan 25, 2015 |
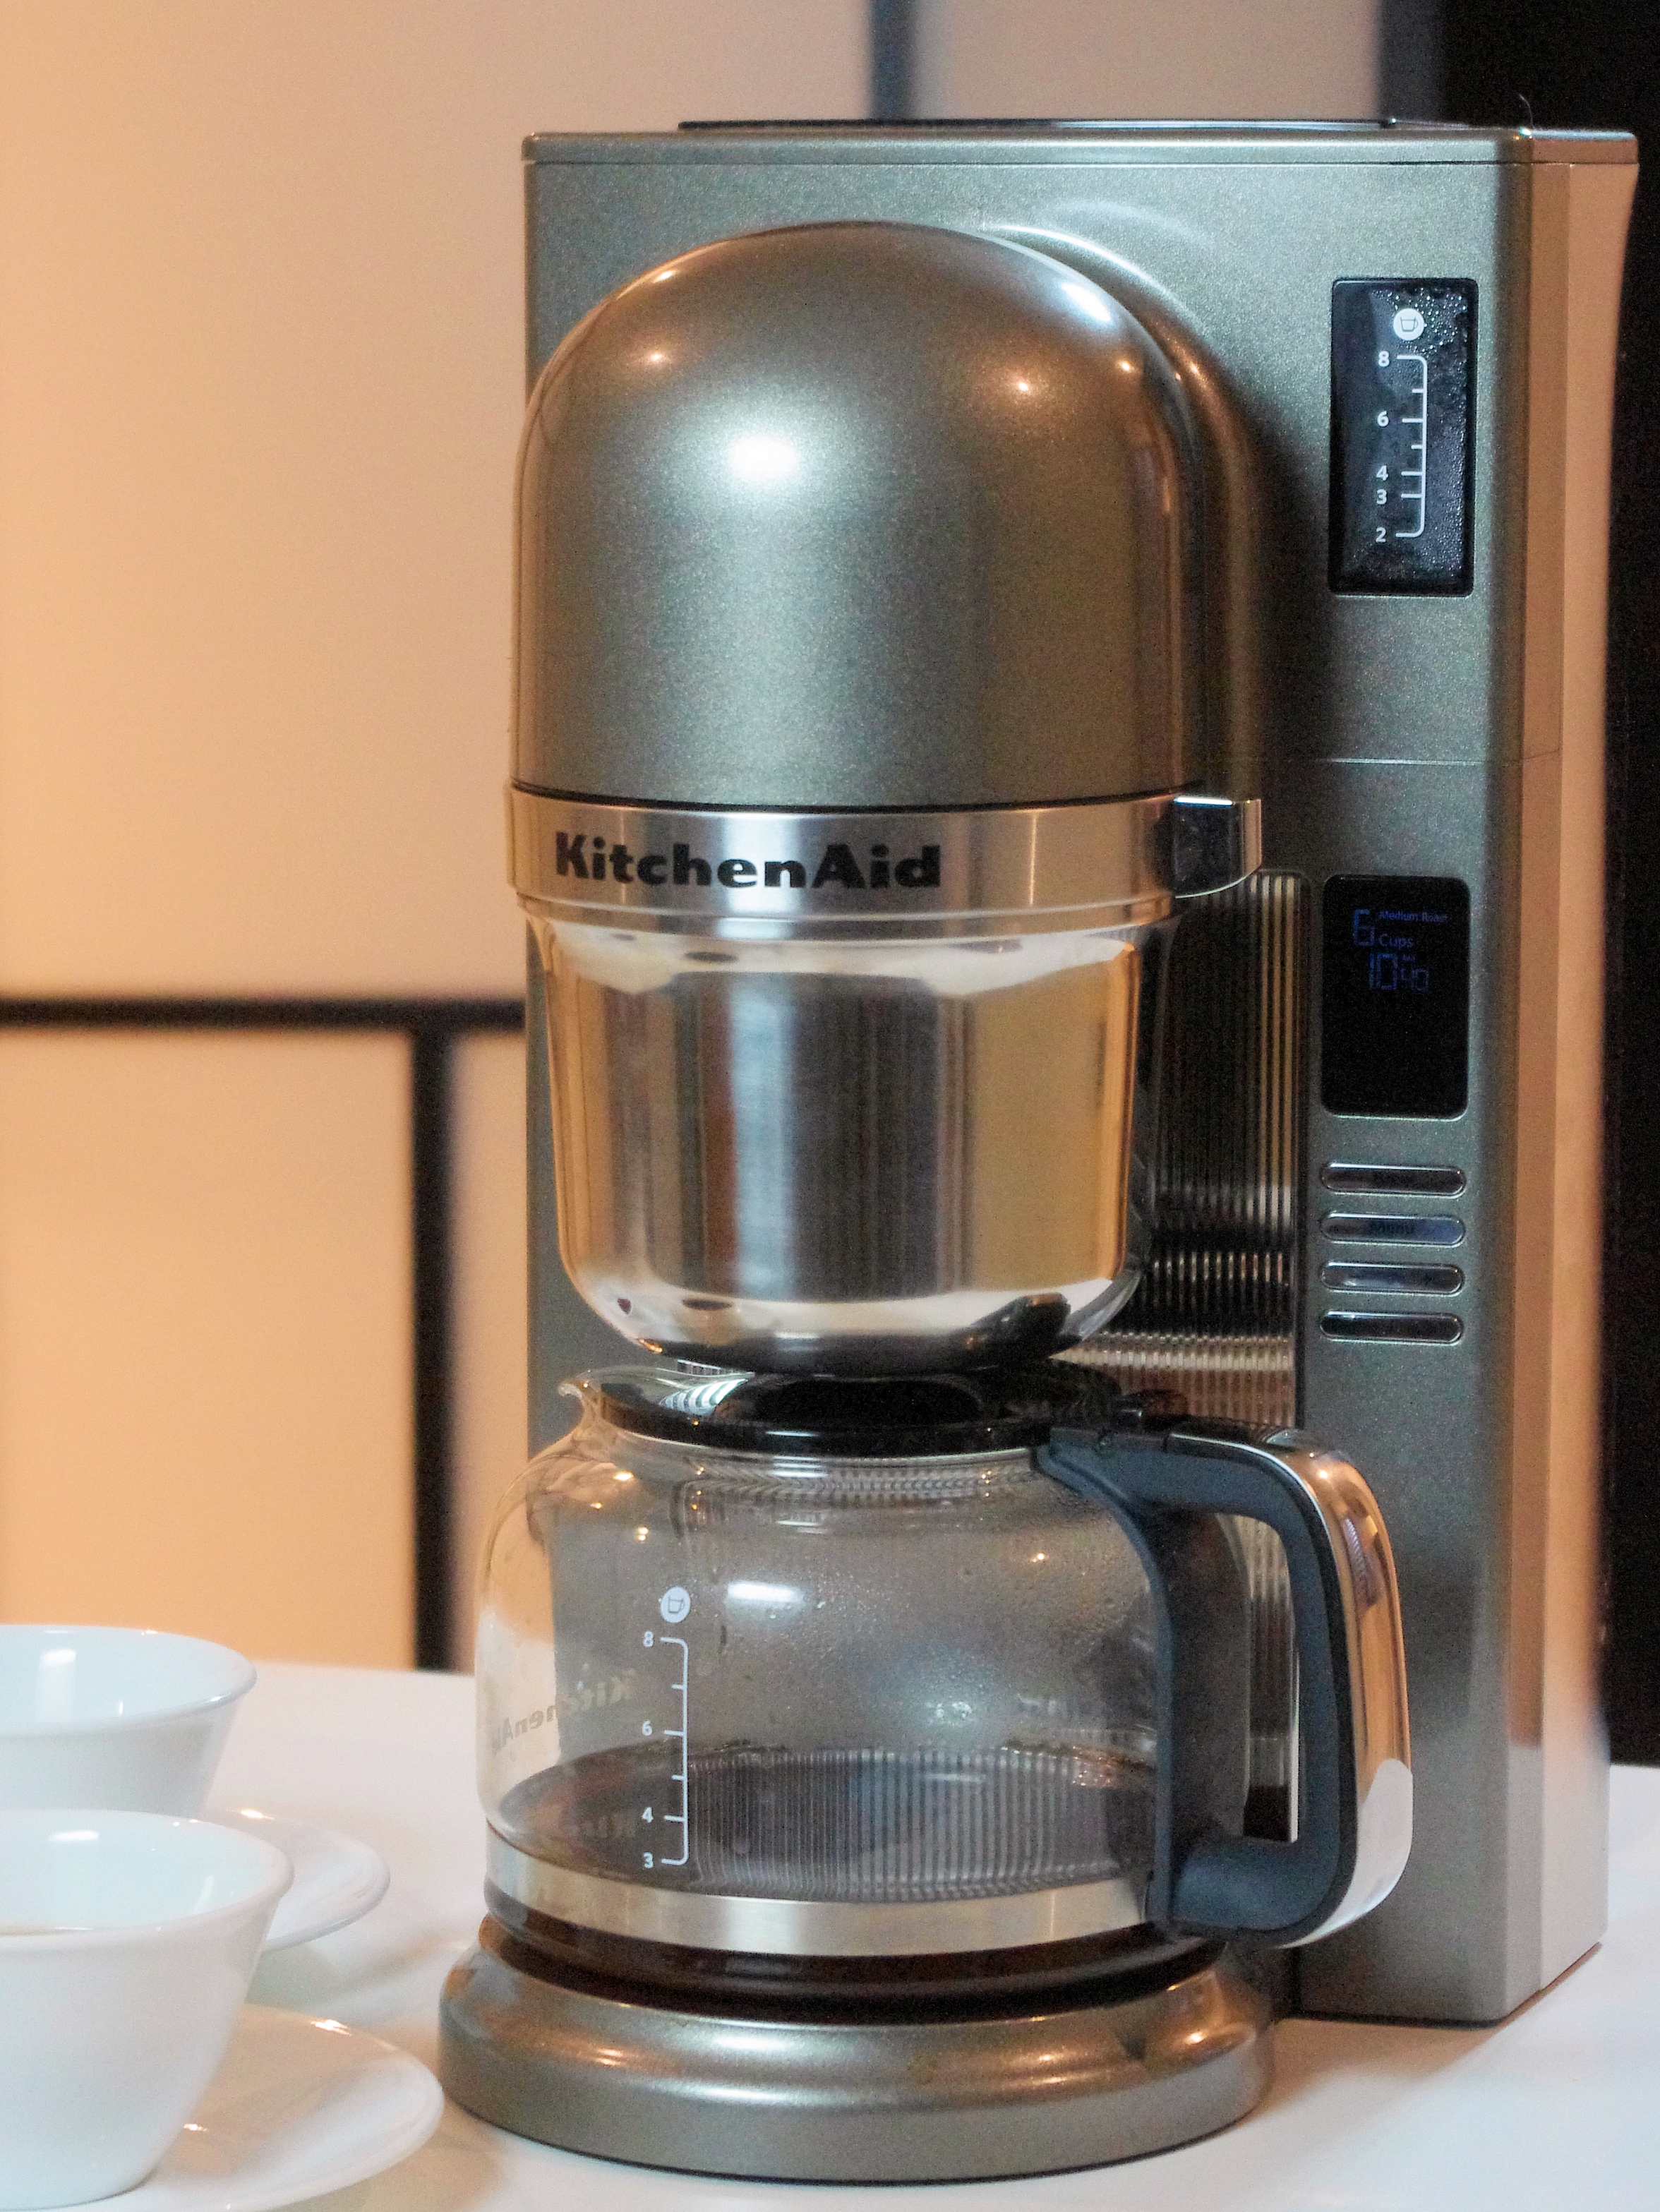
 KitchenAid’s new 8-cup automatic drip Coffeemaker is proof that appliance manufacturers now take coffee making parameters as seriously as they do any culinary art. KitchenAid has long been a coffee innovator, with high build quality and within reasonable price points. This new model has literally been years in the making.
I visited them during summer 2012, during which time their four person design team held a therapy session, where I lay back and told them everything missing from most coffeemakers. Just kidding about that part, but suffice it to say, I left feeling unburdened and they went to work building it.
Sure enough, they brought it to this year’s CoffeeCon San Francisco and Los Angeles events. I recall making a beeline to taste a cup. It was good enough that I requested a model for my long-term at-home tests, from which I made review judgments.
This KitchenAid model has several important features:
• Pre-infusion stage. It dribbles a small amount of water, pauses to allow ultra fresh coffee grounds to get wet and exhale their carbon dioxide.
• Intermittent brewing throughout the brewing process, just like you instinctively do using a manual drip coffeemaker. We’ll talk more about this in in a moment.
• Two brewing temperatures. A higher one is just over 200°F, and optimized for lighter roasted (most Third Wave) coffees. The second, lower temperature setting stays under 200°F and is optimized for darker roast coffees. It’s up to you of course, as it’s so cutting edge that there’s hardly consensus on this subject. Suffice it to say, it’s amazing to see a big brand acknowledging the standards and then going a step further by offering you a choice of two brewing temperatures within those standards. Again, this is sophistication on par with manual brewing geeks.
• Perhaps the biggest news is that the KitchenAid meets SCAA (Specialty Coffee Association of America) brewing guidelines, which are stringent. This means a temperature spec (range: 196°-2015°F), within the given drip time spec of 4-6 minutes.
• Cup number setting. This at least promises to be an attempt to prefigure brewing algorithms so you and I don’t have to. More later, but this just might be their most important feature – if it does what it I think it promises.
First, let’s get this out of the way at the start – most so-called automatic drip brewers are one size brewers that are, by modern standards, not very automatic. If you make a full batch, they do well, maybe even very good, but most coffee enthusiasts eventually discover a manual coffee maker makes better coffee, since you have to figure out each parameter. But still, there’s a need for an automatic maker, because everyone, myself included has something else to do other than make coffee. It’s easy to operate. Just choose your cup setting. I had to get used to it, but the first thing you must do is select your desired cup batch size, but pressing plus/minus buttons. Then press whether you want light or dark roast (higher or lower brew temperature). Then hit brew and you’re ready in ten minutes, no matter what batch size.
How did it do in my tests?
Pre-infusion – The KitchenAid does really do this, but it’s still a best guess. As everyone who brews with manual drip brewers knows, this time varies depending upon how fresh your coffee is. KitchenAid designers chose a reasonable pause. It won’t please everyone, but in my tests, it did a good job of allowing most grounds to rise and fall, and then repeating this drip, pause, drip sequence throughout. Only at the 8-cup setting using extremely fresh roasted and freshly ground coffee did I get any foaming that left residue at the top of the brew basket (near showerhead). Most times it was not a problem.
Intermittent brewing – Part of the benefit of continuing to drip, pause and drip throughout the brewing is let all the water drip through before pouring more water onto the grounds. It seems to achieve a better, more thorough extraction. The KitchenAid did not disappoint. I’m sure there are some that will say their manual drip pours are better still, but for many, this brewer will deliver everything they want from their coffee.
Brewing temperature – Here KitchenAid has done itself proud. Its brewing temperature stability is as good or better than most manual drip, especially if you’re using a traditional kettle. If you’re using a kettle with settable temperature, the KitchenAid still matches or exceeds it, but the difference might be unnoticeable. Still, kudos for the two temperature choices and stability.
Cup setting – Many don’t realize that every automatic drip coffeemaker is optimized in contact time for one size batch. Larger batches will take too long, resulting in bitterness/excess strength; smaller batches mean faster (too fast) contact times and resulting weaker brew. This is simple math. If you baked a half batch of cookies and shortened or lengthened baking times, you wouldn’t expect them to taste right, would you? All drip makers, even manual ones have this challenge. KitchenAid seems to do some adjusting of the drip rate inside to accommodate the changing times, so it lessens it. I’d say they’ve make it work overall. The batches I made between four and eight cups were all between four and six minutes in overall contact time (this spec does not/should not count the time the water is heating with no contact). At the two cup setting, the contact time was not long enough. Keep in mind the cup quality may vary between 4 and 6 minutes contact time, but overall I was satisfied.
There are little tweaks you can try such as grinding a notch finer for fewer cups, or simply upping your grounds to water ratios a gram or two. I’ll leave it to others to explore these options. I settled on 6 cups for most of my tests over a month’s use and found it delivered excellent coffee at all settings between 5 and 8 cups, coffee on par overall with my manual drip brewers.
A couple of extra notations:
• The KitchenAid coffeemaker’s sound is quieter than most other automatic drip coffeemakers and its sound is subjectively nicer.
• KitchenAid is to be commended for offering detailed grounds to cup measuring recipes in their well-written instruction book.
• The water input at the KitchenAid’s top is too narrow for my tastes. I occasionally spilled water while filling it. Maybe it’s just me.
• I routinely filled the water tank exactly to the intended batch cups mark, and found the resulting brew on the carafe at brewing’s end was frequently less. I realize this may be caused by steam loss, but I found it works better to always overfill above the water mark.
Here are a few taste test highlights: I was fortunate to pick up a sample of Martin Diedrich’s Kean Coffee at CoffeeCon L.A. It was a slightly darker roast than most Third Wave roasts, and, (gasp) in my opinion, the better for it. It really shined, especially with using the lower (but still SCAA-approved) temperature setting. This kind of coffee really has that chocolate taste (cliché though it seems) and that temperature just seemed to highlight it.
Another treat was Counter Culture’s latest Ethoipian in a new package. This one really called for the higher temperature, but fully matched my expectations, with a fruitiness and acidity this coffee brewer brought forth in all its glory.
A surprise hit of CoffeeCon LA’s roasts was Temple Coffee’s Panama Geisha. Oh my Lord! What a coffee!! I did two batches concurrently. It was so good I went past my limit. The high temperature was my preference, but it did splendidly (albeit differently) in each. Note: I found a perfect formula for me was to make six cups, using 50 weighed grams of beans, medium-fine grind. The slightly less than full batch allowed even the freshest coffees to brew properly, and gave us a perfect way for Pat, I and a friend each have a couple of cups each.
The KitchenAid 8-cup is highly recommended.
by Coffee Kevin | Jan 2, 2015 |
 I realize this article will be read mostly by coffee enthusiasts already so involved in brewing that they likely have their own views regarding brewing, and its three most important variables: time, temperature and grind particle size. But, lately there’s been dissention over what for many years appeared to be consensus among the trade. As brewing as an art and craft (hence my book’s title) has developed, there are those who question the basics.
Questioning the basics is, I think, a good thing. Anyone who’s been in family counseling knows it’s a healthy thing to revisit how you divide labor. When it comes to processes, it’s a good thing to reconsider the variables. My observation is that coffee brewing is still being analyzed. Don’t forget that as roasts, types of beans, brewing methods and consumer tastes change, it’s a good idea to do a few experiments. If they confirm the basic parameters, so be it. But, they may not, and why keep doing something wrong?
Historically, much coffee was boiled. I can think of all kinds of reasons for this: pre-chlorination food safety, ease – the bubbles tell you the water’s ready, and thrift – the cheapest way to maximize extraction strength is to use the highest temperature.
The Coffee Development Group, or was it the Pan-American Coffee Council – some predecessor to the Specialty Coffee Association of America (SCAA), did extensive testing, using food experts, not just coffee folks, which resulted in the standards that have been in place for many years.
They include:
• Grind size specifications, basically finer for short extraction times, coarser for longer ones. The current challenge with enthusiasts likely to grind at home, is how to confirm this. It used to be written right on a coffee can.
• Brewing Temperature – It’s easy to tell consumers: “Under Boiling”. Everyone seems to get that now. The last percolator I came in contact was in my late Aunt’s estate sale. BTW, 195°-205°F just tightened to 196°-205°. The extra degree may or may not matter to you, but according to my little birds, the US and European specialty coffee groups wanted to share the same standards for a variety of reasons.
• Contact time – In my observation, this is the one most difficult to control, partly because it’s so difficult to measure, especially in intermittent drip methods. Ever tried?
Recently, I’ve run into a number of enthusiasts, baristas, brewer designers, who complain like music composition students do about tonal scales. Recently, I was sitting in the office of one of the most influential big-coffee business owners, who many would say personifies the word establishment and he told me he believes 200°F is too high a brewing temperature. I’m sympathetic. After all, what kind of thinker would I be if I didn’t like to challenge rules? “Question Authority” – That’s my bumper sticker!
But, I’m here to re-commit CoffeeCompanion to following the rules, at least for now. We need some kind of reference point, or a dialogue is useless. The fact is that a great number of culinary experts were consulted in creating the standards. These folks had taste buds. This wasn’t a casual industry lock down for convenience.
I will always challenge the established rules. I will also follow the standards and use them for my tests. I may expand my tests in certain instances but I will always strive to identify those instances.
Meanwhile, I urge those of you who are doing your own home experiments, playing with brewing parameters to customize your methods to your individual tastes, a worthy pursuit even within the parameters, to start off following the standards. If you decide your Chemex or Aeropress tastes milder, better straight (minus cream or sweetener) when brewed at 180°F, no one is going to take the children from your home.
But, as my music theory teacher said to us in college, “Learn the rules so they can be broken by design, not ignorance.”
We are living in a golden age of brewing. There are all kinds of new brewers, the re-discovery of old ones. The profession of barista confirms that the industry gets that how its coffee is created in a coffee establishment makes a difference. Remember: Wine tastings don’t need bartenders, but coffee tastings need baristas.
CoffeeCon, my ‘lil ol’ coffee show is great fun, but I have an agenda as plain as Karl Marx at a school board meeting. I want consumers to discover coffee as a culinary art and invest the same passion they do into cooking into brewing their coffee. Anyone can do a coffee tasting. We are a coffee university.
So, just FYI, I will keep taking any coffeemaker’s temperature, use a stopwatch to check how long it subjects your (ever-increasing-in-cost) ground coffee to hot water, and play with grind and include those results in my reports.
by Coffee Kevin | Nov 22, 2011 |

Krups Moka
What Is It? — The Krups Moka is, if anything, an attempt to make a large quantity of something called a Moka. Moka is a problematic word. To much of the world, it means chocolate or a coffee bean varietal from Yemen. In Europe, it means a sort-of stovetop espresso beverage. The Krups Moka is none of these. It is a slightly pressurized automatic drip machine, a sort of hybrid. I would hesitate to compare it to a stovetop Moka and it is certainly not any kind of “mass espresso” machine.
I decided to test it according to drip standards, although, as you will see, it is really in its own category and you will be happiest if you regard it for its own value, rather than attempt to slot it as a preexisting type.
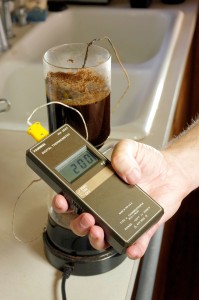
Temperature — The Krups Moka T8 works like an electric water kettle. The water boils and that pressure forces it up and over the grounds. Most automatic drip brewers are designed to deliver the water to the grounds at lower-than-boiling temperatures; the standard is 195 to 205 Fahrenheit. Here was see boiling or very near it water, with somewhat long gaps between as the water is boiled in pulses.

Level but don't tamp
Time — This makes it very difficult to determine the exact water/grounds contact time. The time from when the water first hits the grounds until the last drop leaves is something like seven minutes. If boiling water is truly in contact with fine grind coffee for this duration, we could expect some pretty bitter coffee, couldn’t we?

Almost a mouse tail
Grounds saturation — The Krups Moka T-8 does a very thorough job of getting all the grounds wet. The combination of a sealed grounds chamber and the pulse flow of pressurized water makes sure no flavor is left behind. There are also six exit holes in the filter basket, encouraging a quick escape once the water has contacted with the grounds.

Spent grounds are bone dry, just the way you want them.
Cup tasting — I have observed that lighter roast coffees seem to handle higher brewing temperatures. George Howell, Terroir.com, has many beautiful light roast coffees. He buys micro lots of prize winning coffees and it shows in both the cup and my monthly charge card statement. He’s got a long-term relationship with La Minita Costa Rica coffees. I put sixty grams of fine grind La Minita in the Krups unit and it tasted fine, with surprisingly no bite that one might expect using these high brew temps. What really surprised me was putting some Boyds coffee preground in this brewer. It’s ground for auto-drip and it’s a comparatively dark roast. I’d expected the unit to favor lighter roasts, but this coffee compared favorably to the La Minita. It’s a blend and a complex one, far more than I realized. My previous cuppings had been in a Technivorm.
I expected light roasts to taste right, but I didn’t expect a darker-than-average coffee to shine. But, the Boyd’s Rip City Blend, tasted about as good as any coffee I sampled. Perhaps a greater surprise is that it’s pre-ground. I know some of you are going to be shocked, but it’s true. I was pondering why, and I think part of the reason has to do with the excellent grind pre-ground coffees have. It’s one area where they exceed almost any grind possible at home. Also, as Randy Layton expressed to me as far back as when we served on the Specialty Coffee Association’s Technical Standards committee, as well as in our recent video Coffee Brewing Secrets, he thinks that coffee needs to rest after roasting before it extracts to its potential. I know I’m speculating, but it seems possible that high pressure brewers require more exact grind in order not to impede their flow rate. That’s a guess, but the results I got with the Boyd’s sample was as complex a cup as I’ve had, with absolutely no bitterness.
Conclusion — The Krups Moka is not for everyone. Many consumers won’t understand why it takes nearly five minutes just to heat the water up before its first burst. Nor will they appreciate that the seemingly overside bottom water boiler is not truly a warming plate. The first cups will be piping hot, but the coffee won’t keep warm for hours like it does with some auto drip machines. The exact placement of the brewer under the hot water release valve is critical. I misaligned it once and it was quite a mess. Once you get the hang of it, it’s not difficult, but it’s non-standard.
What sets the Krups Moka T-8 apart most though is the outstanding cup quality. I truly wish they’d reintroduce it to Americans as at home coffee is getting more serious. Perhaps they will. Meanwhile, check the auction sites. It’s a winner.
by Coffee Kevin | Oct 28, 2011 |

This delightful coffee brewer is commonly called a flip-drip, but actually it is probably mistakenly called a stovetop espresso machine or Moka just as often. It’s a rare animal in American, and, I suspect, most kitchens worldwide.
Which is a shame, because it makes a distinctive cup of brew and, to my sensibilities, suits a number of coffee brewing occasions admirably.
The machine itself has three basic components: half which is filled with water, a second part which features a filter holder for ground coffee and a third part which receives the coffee after it’s dripped through the filter. It is in fact a drip machine in principle.

Disassembled - easy once you do it a couple of times
Fill the part with the tiny hole in it with good water up just short of the hole. Place 27 grams of medium grind coffee in the filter section and screw its cap on tightly. Insert this part into the part containing water. Assemble the other half, the half which will receive the finished brew on top. Place the finished, assembled unit on a stovetop. Turn heat on to low/medium.
As the water heats up it will expand, causing the waterline to rise, just like Al Gore explained in his fine film, An Inconvenient Truth. When the water nears boiling, a small amount will spit out of the hole in the side.

Watch for a bead of water, which means it's ready to flip
Now, shut off the heat and flip the unit over. The hot water will begin to drip through the grounds bed within the second piece. In a few minutes you will have some delicious coffee. Here is how it meets its specs, and why I like it:
Temperature — the temperature is well within accepted limits, although naturally, it varies slightly with just when you turn it over. I found by inserting a narrow thermocouple (tiny wire thermometer) into an operating unit, that it regularly measured 205, at the high end of accepted, but well within limits (195-205 is industry recommendation).
Time — the Neapolitana is grind dependent and can vary slightly depending upon how you “pack” the grounds. I do a little smoothing to make sure they lie evenly, but I do not attempt to tamp it, although I admit it occurred to me as an option. I found the contact time to be around four minutes and could be lengthened by finer grind or tighter packing, but I found no need to do so and I think it would be counterproductive.
Grounds saturation — this unit has a completely inboard filter, which is highly desireable from an engineering perspective. There is no opportunity for grounds to be missed during extraction. They are completely submerged during brewing and even the hot water has no exposure to the external environment before it contacts the grounds and becomes coffee. Its first exposure to the air is once it’s in the lower (post-brewing) half where you will sense the delightful scent from its pouring stem, maybe seeing a little steam as well.

Smooth but don't tamp
The Cup — I tried a number of coffees, but one of my favorites was a (gasp) Starbucks Yemen Sanani, my vote for the best coffee Schultz and Co. has released this year. I happened to wander by a bag of Guatemala from a local roaster, Arbor Vitae, and it delivered pleasing results as well, a lighter roast. The cup from this machine has plenty of body and acidity, although the filter delivers plenty of cup sediment. George Howell is not going to like this machine. I admit I preferred the Bunn NHB for George’s Costa Rica microlot coffee.
On a nice fall day, sitting with your significant other outdoors, this brewer makes a terrific cup and the thick stainless steel keeps the coffee nice and warm, not something I typically include in a review, but it’s a nice extra.
 The Hario Syphon is perhaps the ultimate quality siphon, also long-known as a vacuum coffee maker. The Syphon works on the principal that near-boiling hot water in an enclosed lower vessel releases steam that expands, forces the hot water up through a tube into the upper bowl, where it is inherently the right temperature to brew coffee. As long as the lower bowl is kept heated, the water will stay up there, brewing coffee. The bubbling below causes the water in the upper bowl’s water to agitate the grounds, facilitating the extraction process. When the operator decides enough is enough, she simply removes all heat below and within about a minute the cooling and contracting vapors below cause the lower bowl to suck (hence the word vacuum) the finished brew back down into the lower bowl. Oh, did I mention there is always a filter between the two bowls? Haha, that alone is worth a patent. Siphons vary in the heating method (earliest samples were flame powered) material (glass is original and common, metal durable but no theater, plastic combines both benefits but it’s plastic) and filter type. The filter type is likely the most important of the variables to affect taste, and I’ll go into that later.
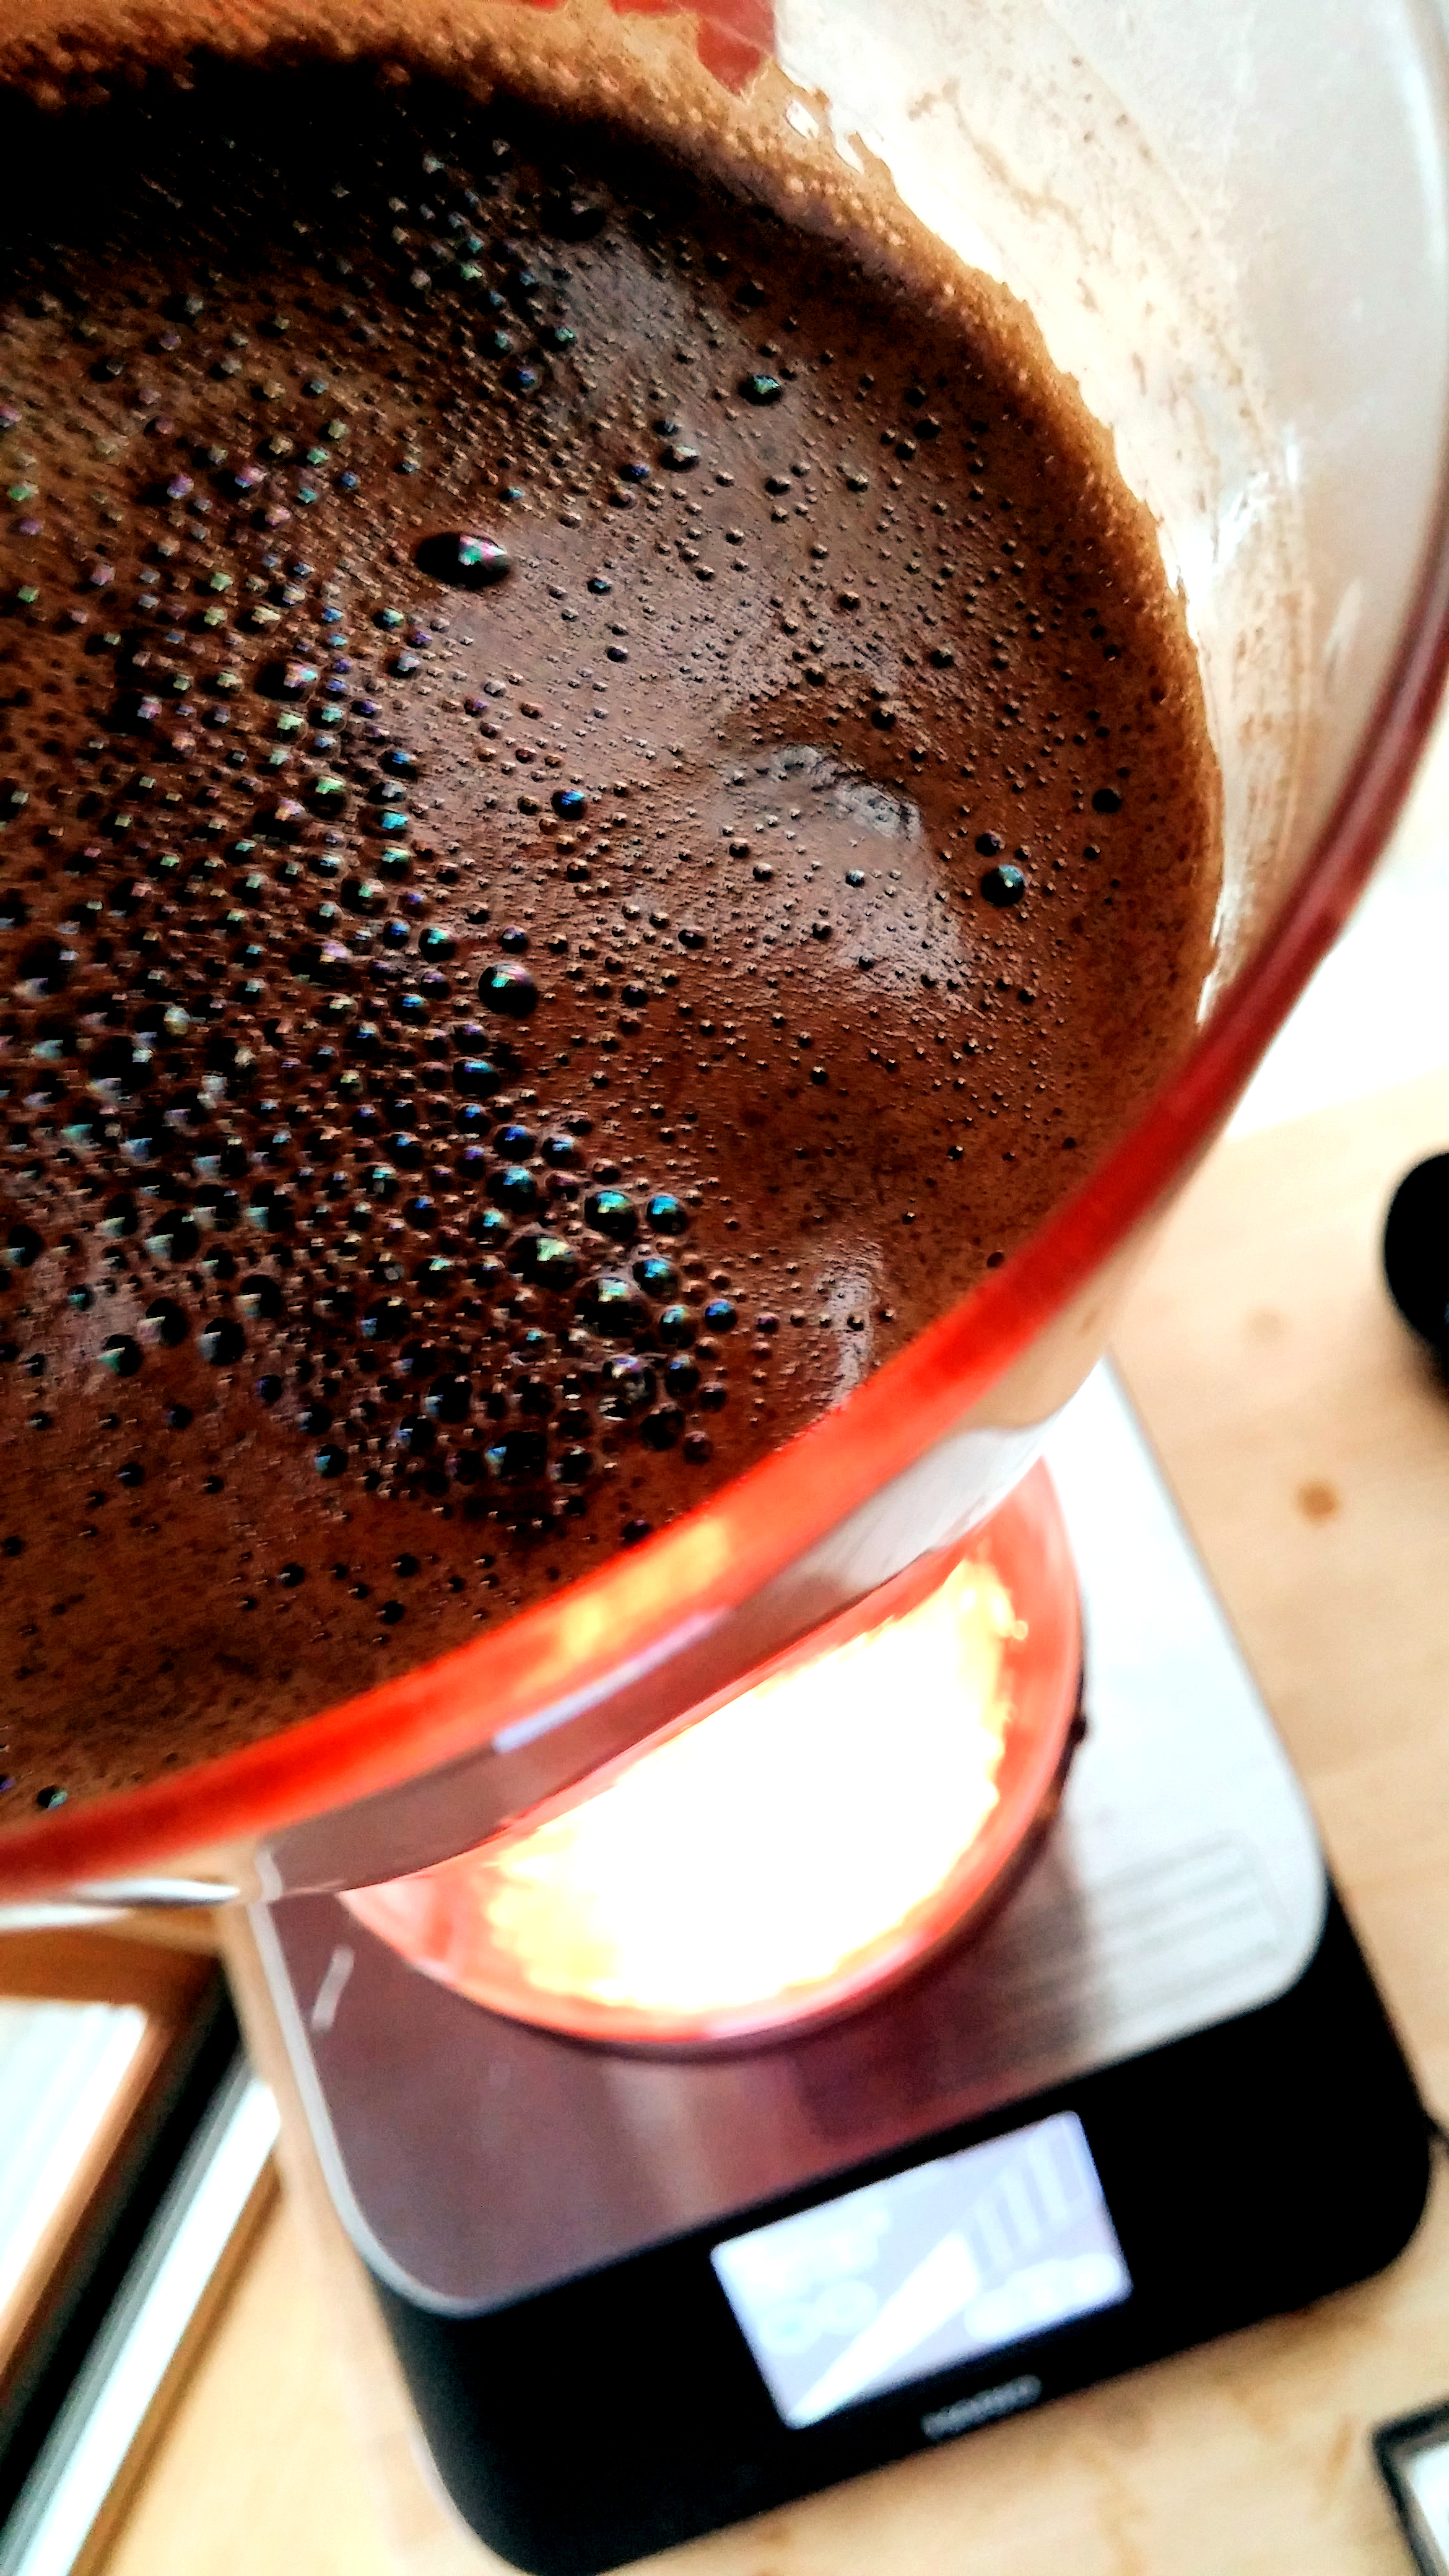 Should history ever agree to repeat itself in a different order, I’ve long felt the siphon would have been the ideal brewer to replace drip. After all, the siphon fixes the following drip issues:
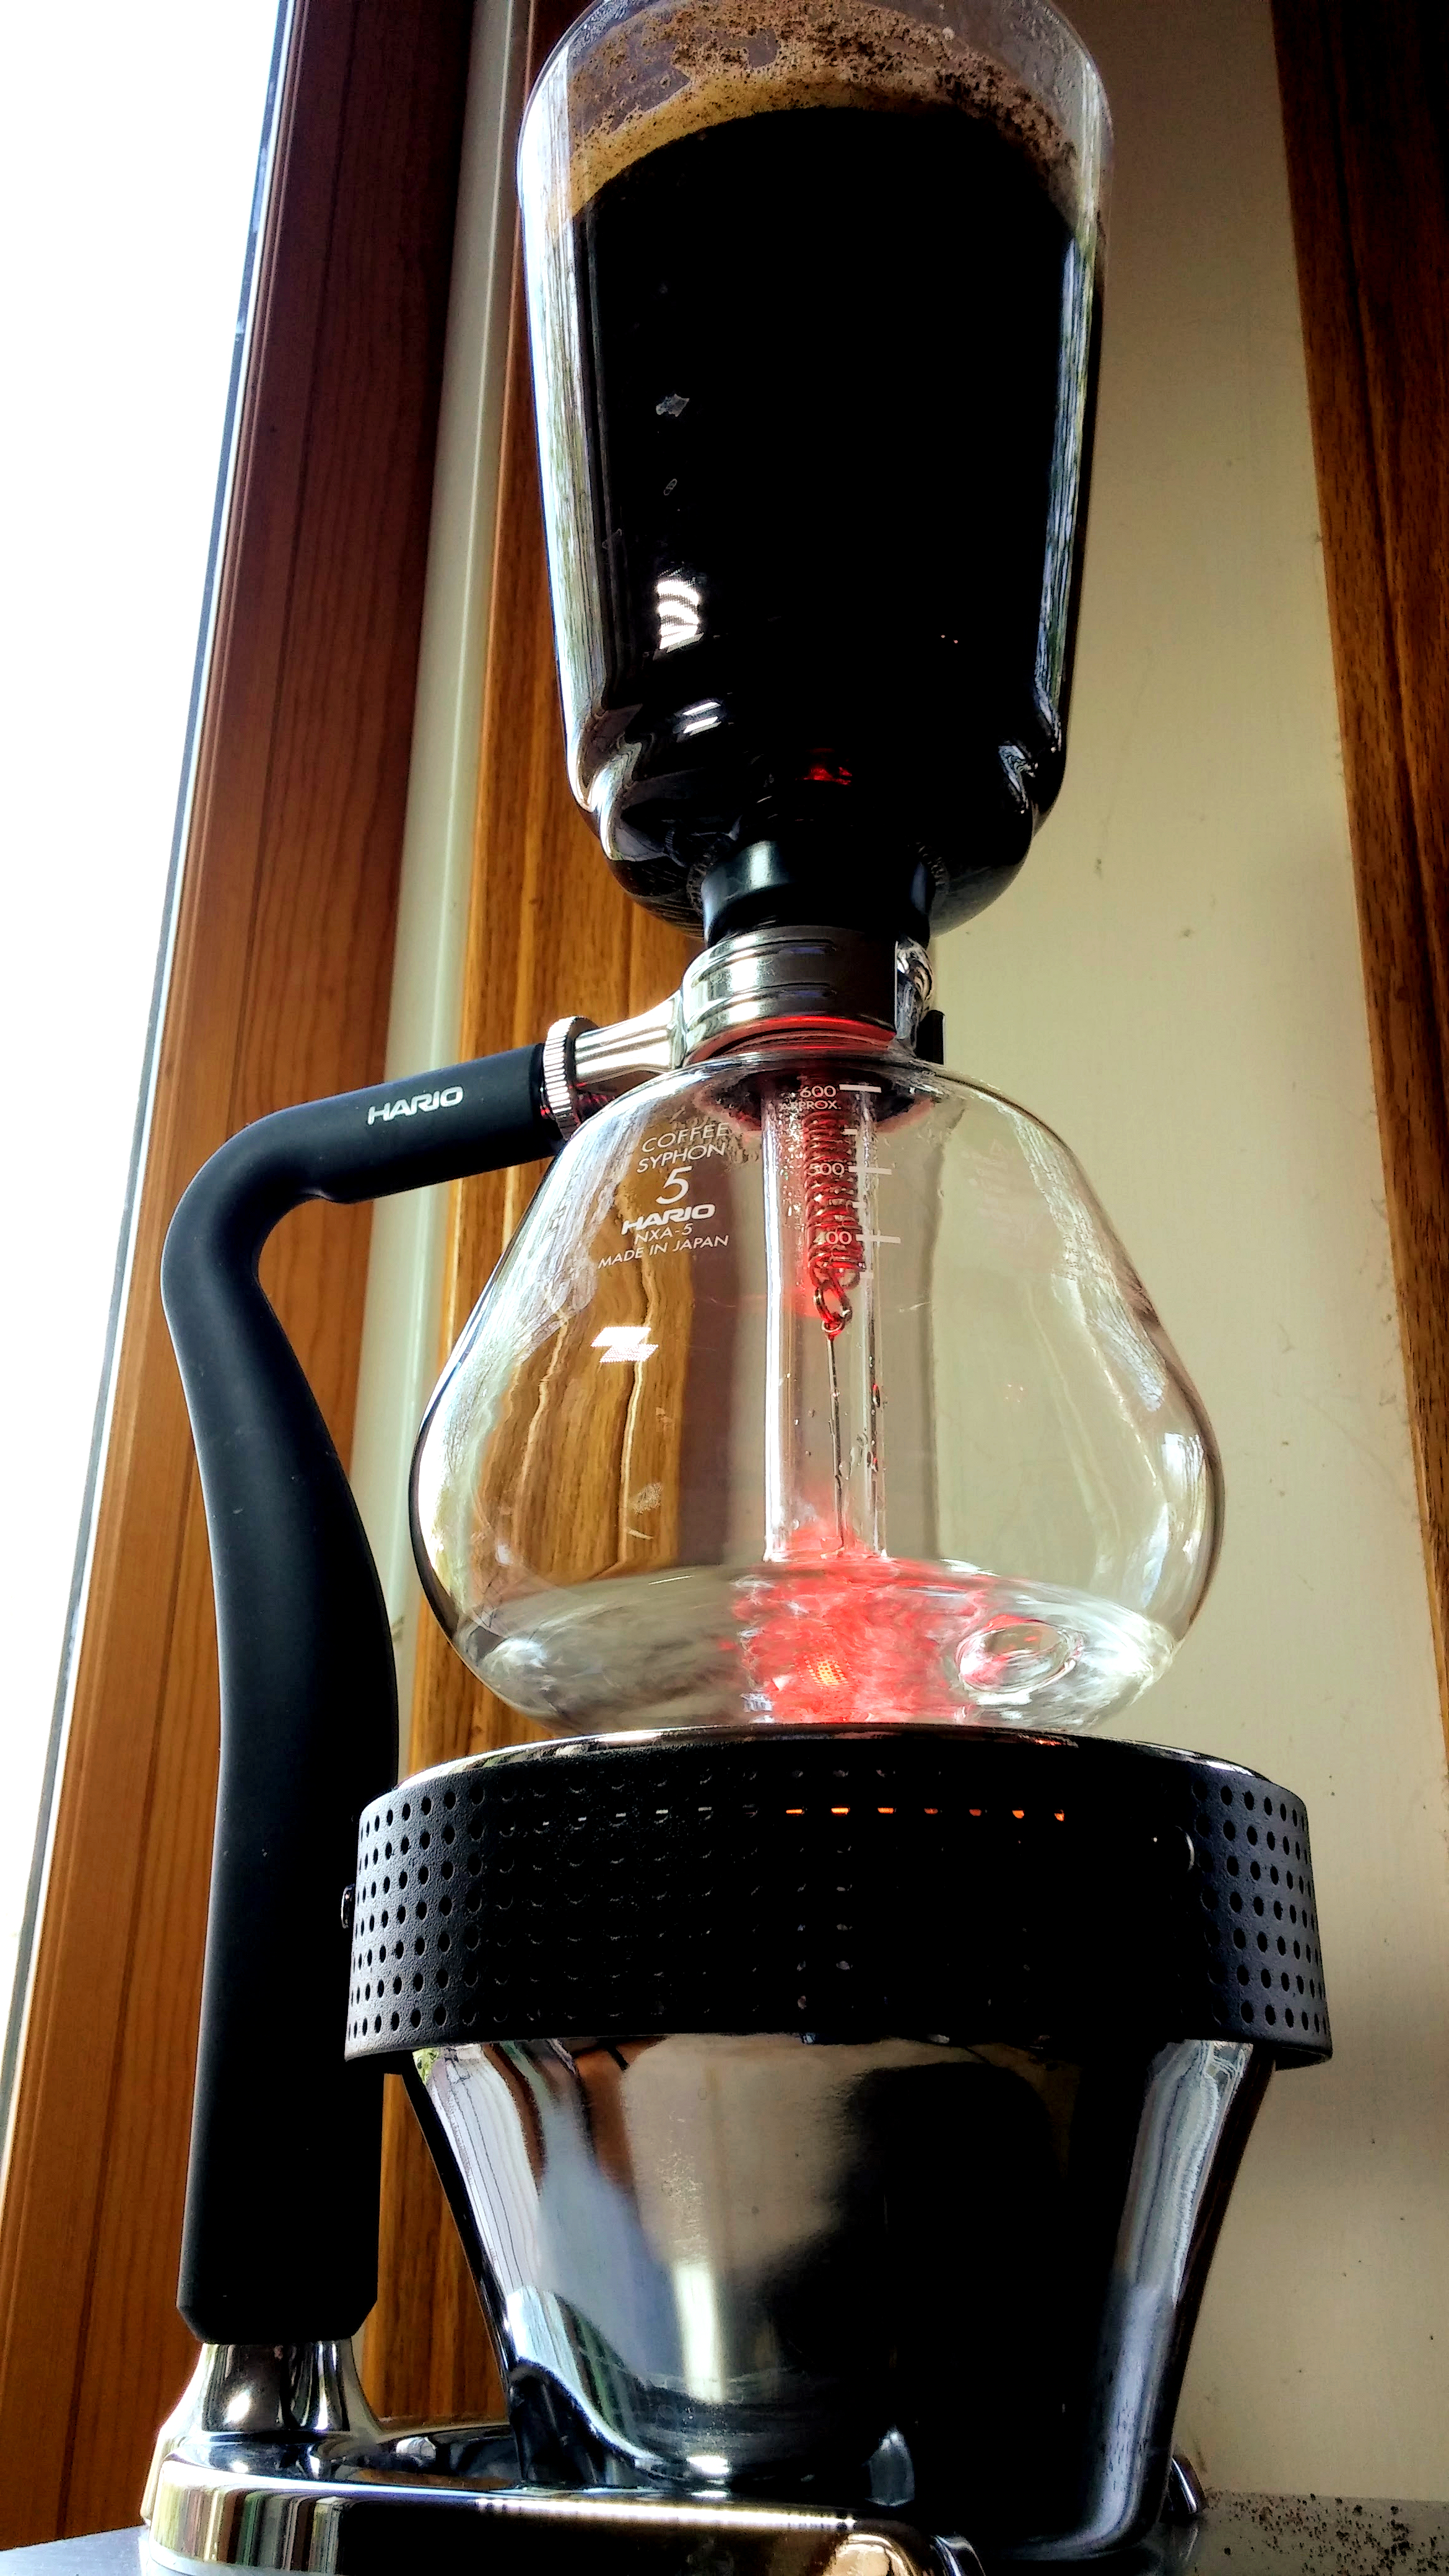 You get:
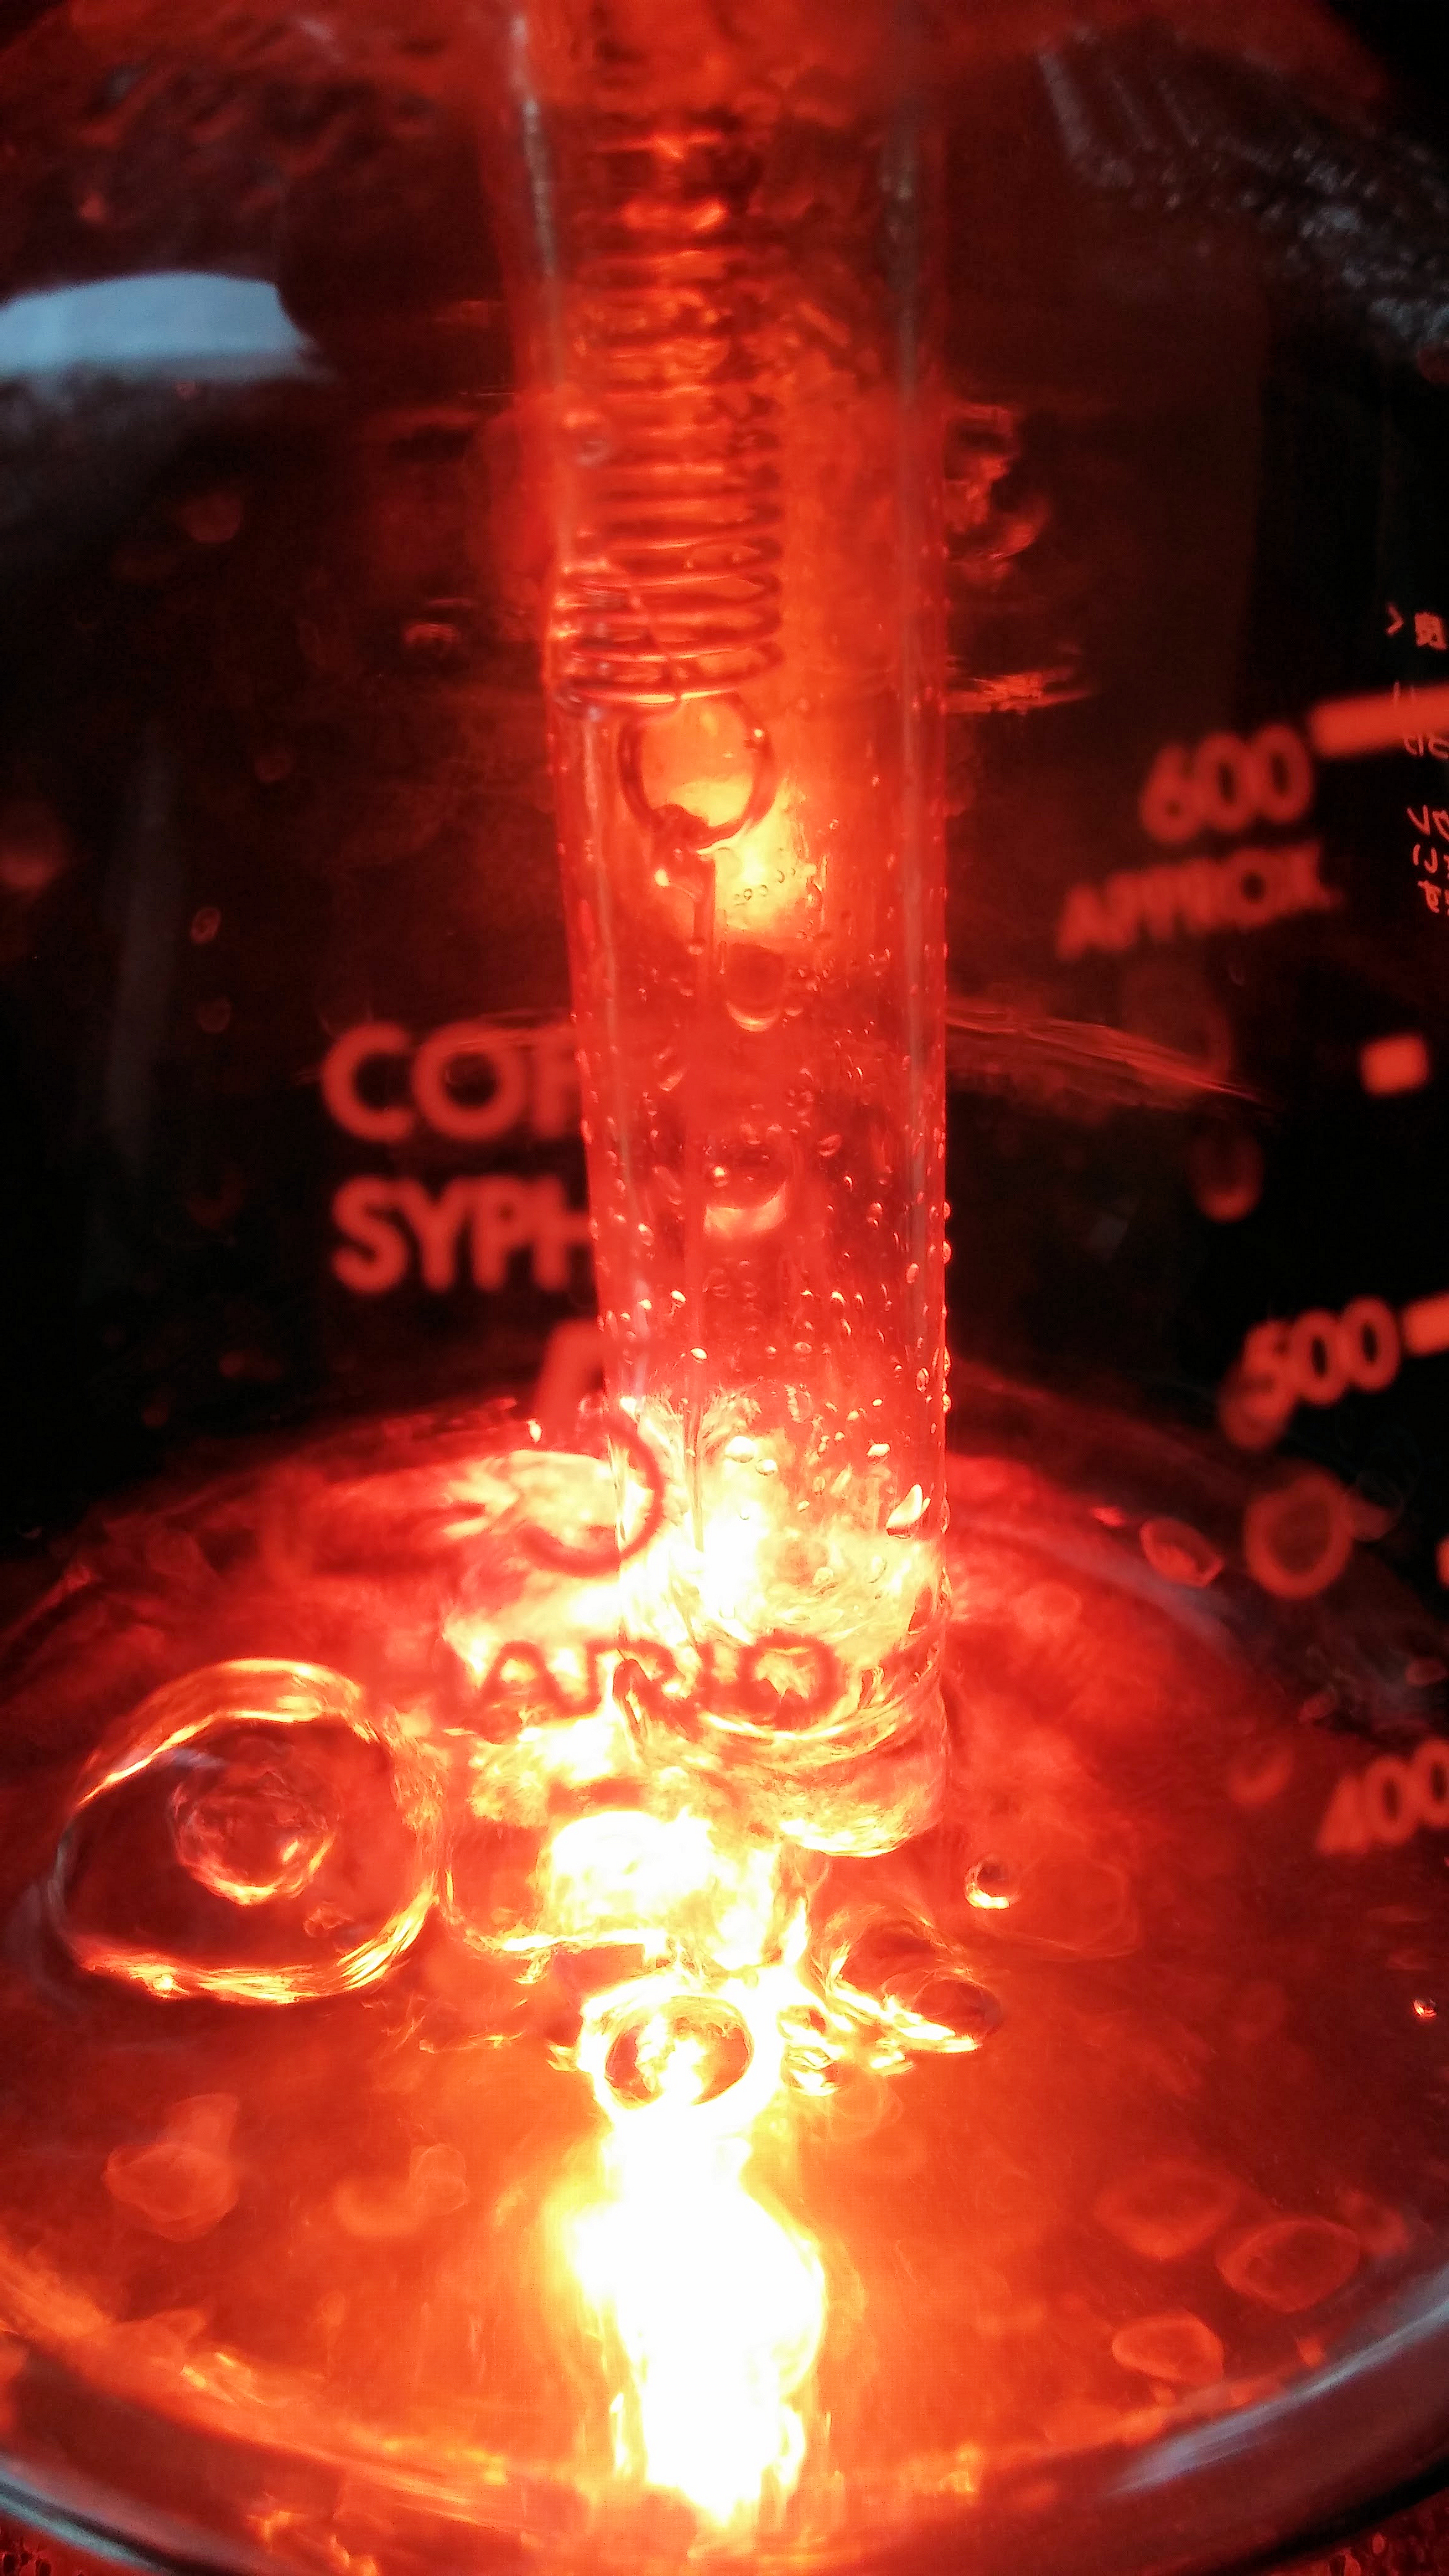 So, recommended or not? I will never knowingly write anything but the truth in this blog. While I acknowledge that this brewer still requires more active concentration from the end user, I also know it makes some of the best coffee I’ve yet tasted. No getting around it. For ultra-fresh coffee, very good quality coffee, roasted to its more flavorful degree, the Hario Syphon does a unique job. Carefully used, you can get a very thorough extraction, full of fruit and complexity. You truly feel you are tasting deep into the coffee. So, yes, highly recommended, with the caveat that you must become part of the task of brewing it. It is not yet truly automated in this product, and if used in a way that is automated, you are, in my opinion, giving up flavor in exchange. How Do I Use It? There are lots of ways to use a siphon or vacuum brewer. Here’s my personal method.
 Some people use fine grind for vacuum. I used to, but lately I’ve found a coarser grind to work best. Siphons can use any grind as grind really does little to affect contact time. Of course surface area exposure affects the taste strength; that remains. Using the metal filter I find the coarse grind reduces particles in your cup. I use close to what I’d use for regular drip.